 Clara•🕑 October 13, 2026•💬 No comments
A wrap is the most forgiving garment there is. It has no armholes, no shaping, no gauge that has to match a body measurement, and nothing that can be the wrong size in a way you cannot wear. It is a rectangle, and the only real decisions are how big and how heavy.
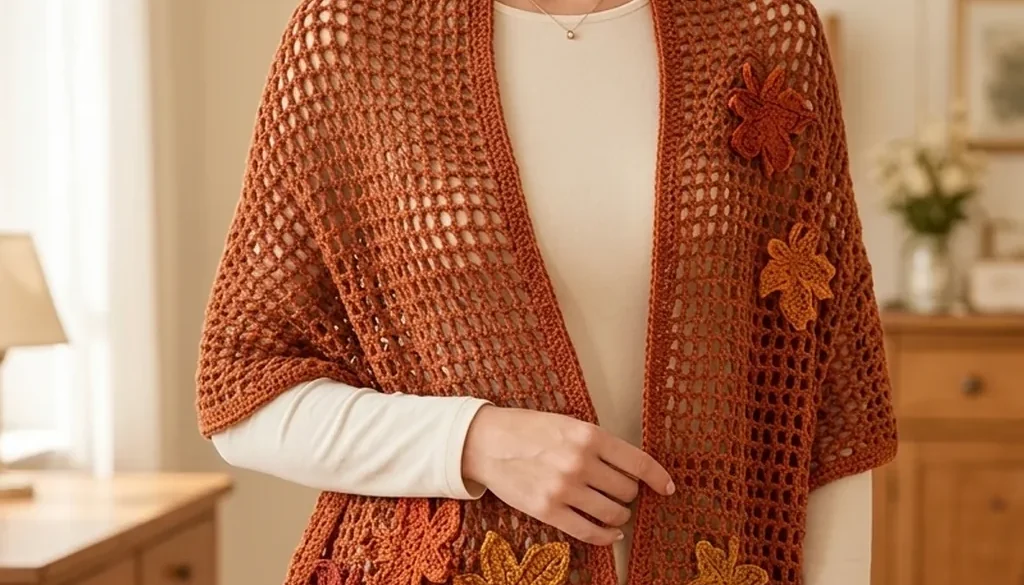
That makes it the right place to put something decorative. A scattering of maple leaves across one end of a plain rust wrap turns a rectangle into a project, and because the leaves are made separately and attached at the end, you can keep making the wrap while you decide how many you want.
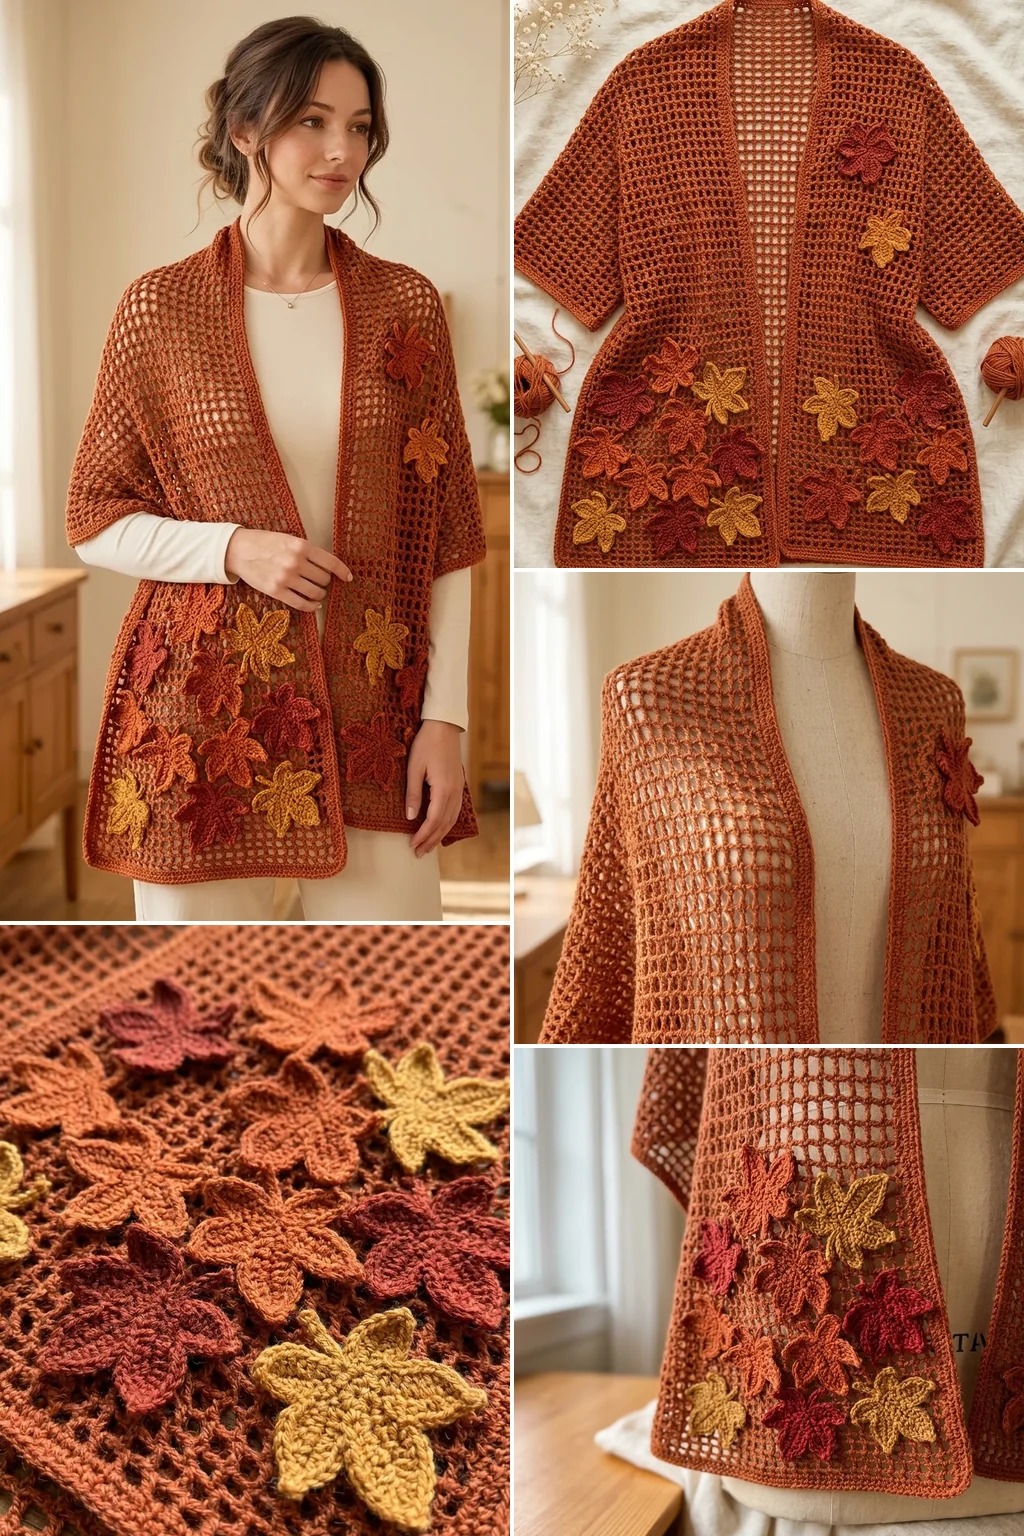
This is the rust maple leaf wrap crochet pattern written as a construction guide: the fabric, the leaf motif, where the leaves go, and how to attach them so they stay flat.
Rust Maple Leaf Wrap at a Glance
| Skill level | Advanced beginner — rows, motifs, sewing |
| Yarn | DK or sport wool blend |
| Hook | 5.0 mm body, 3.5 mm leaves |
| Time | 14–20 hours |
| Finished | 18 × 70 in, blocked |
| Leaves | 9–15, worked separately |
Why a Rectangle Rather Than a Triangle
Triangular shawls are the more common crochet shape and they are worked from a point outward, which means the row length grows the whole time. By the final rows you are working three hundred stitches to gain a quarter inch of depth.
A rectangle works at a constant row length from the first row to the last. Every row takes the same time, the count never changes, and you can stop whenever it is long enough. It also drapes differently: a rectangle hangs straight from the shoulders and stays put, while a triangle wants to slide backward unless it is pinned.
For a wrap carrying motifs, the rectangle wins again. Leaves need a flat area to sit on, and a triangle’s only flat area is the part nobody sees.
Materials
- Body yarn: 900–1,100 yards of DK or sport in a warm rust. A wool blend rather than pure cotton — wool blooms when blocked and holds the drape.
- Leaf yarns: about 30 yards each of three autumn shades. Deep rust, burnt orange, and a gold or ochre.
- 5.0 mm hook for the body — larger than the band suggests, which is what gives a wrap its drape.
- 3.5 mm hook for the leaves, so they hold their shape against a loose fabric.
- Blocking mat and pins, or a spare bed and towels. A wrap takes a lot of surface.
- Sewing thread to match each leaf colour, and a sharp needle.
- Tapestry needle for ends.
Three leaf colours rather than one. A single shade reads as a pattern repeat; three read as leaves, because real ones are never the same colour as each other.
Sizing a Wrap
Width comes from the foundation chain. Length comes from how many rows you work. Neither is fixed, and both are easy to change at any point before you start the border.
| Style | Width | Length | Yarn | Leaves |
|---|---|---|---|---|
| Scarf wrap | 14 in | 60 in | 750 yds | 9 |
| Standard wrap | 18 in | 70 in | 950 yds | 12 |
| Generous wrap | 22 in | 76 in | 1,150 yds | 15 |
| Travel blanket | 26 in | 80 in | 1,400 yds | 15 |
Published rectangle wraps sit in the same range — around 14 to 20 inches wide and 60 to 80 long, with heavier yarns pushing toward the upper end. A narrower wrap is a scarf you can drape; a wider one you can sit under.
The one measurement worth taking from yourself rather than a table is the length. Hold a tape from one wrist, across the shoulders, to the other wrist. That is the length at which a wrap stays on without being held.
Gauge, and Why the Swatch Has to Be Blocked
Gauge matters less on a wrap than on a garment, but it still decides the finished size and the yarn quantity, and an unblocked swatch will mislead you about both.
Open crochet grows substantially when blocked. One published mesh wrap measures 25 stitches and 9 rows to 4 inches before blocking and 16 stitches and 7 rows after — the fabric relaxes to nearly a third wider. A lace-weight wrap in the same sources went from 65 by 11 inches unblocked to 67.5 by 15.5 blocked, gaining four and a half inches of width and only two of length.
That asymmetry is worth holding onto: an open fabric gains far more width than length when blocked. Plan the foundation chain for the blocked measurement, not the one on the hook, or you will finish a wrap several inches wider than you wanted.
- Work a swatch at least 6 inches square in the exact stitch and yarn.
- Wet it, pin it out to a natural relaxed shape, and let it dry completely.
- Measure the blocked swatch and work out stitches per inch from that.
- Multiply by your target width for the foundation chain, rounding to your stitch repeat.
Choosing Yarn for Drape
Drape is the whole point of a wrap, and it comes from three things: yarn weight, fibre and hook size.
Lighter yarn gives a more open fabric with more drape. A DK wrap on a 5.0 mm hook falls softly; the same stitch in aran on the recommended hook stands away from the body and sits on the shoulders like a blanket. If you want warmth without stiffness, go lighter in weight and larger in hook rather than heavier in yarn.
Fibre decides how it ages. A wool blend relaxes and softens with wear. Pure cotton has no memory and a cotton wrap grows longer every time it is worn, which on a 70-inch piece is noticeable within a season. Acrylic holds its shape but has the least drape of the three.
Go up a hook size, sometimes two. This is the single easiest change. The same yarn on a larger hook makes an airier fabric that moves, and on a wrap there is no fit to protect and nothing to lose by going loose.
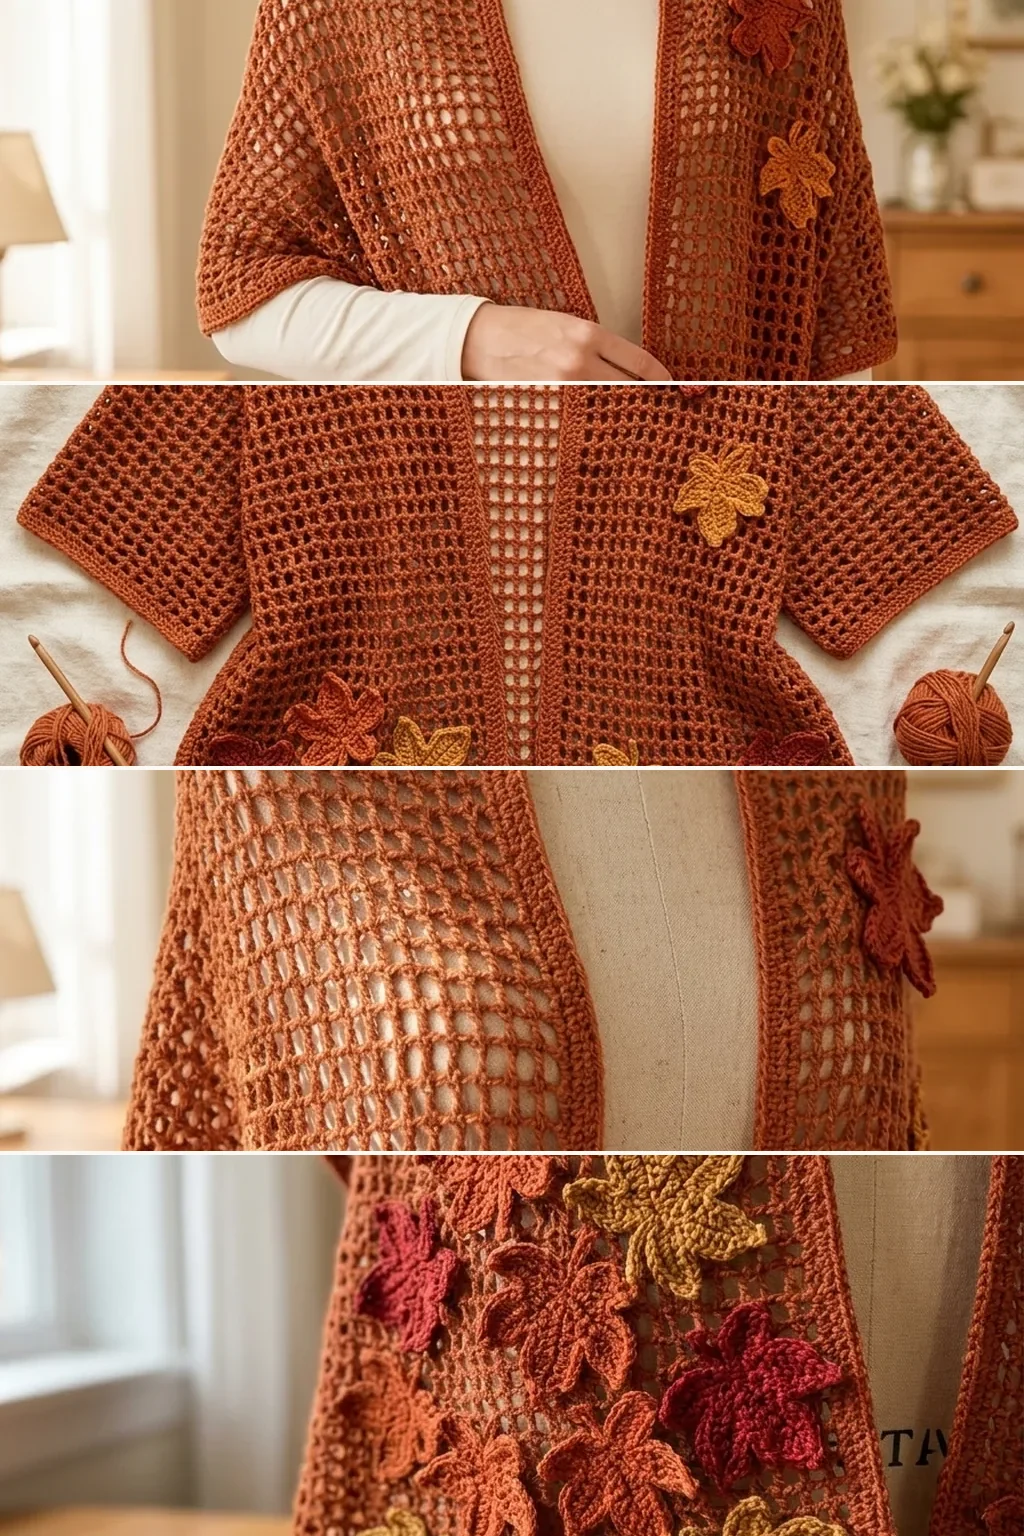
The Body Fabric
Any stitch works. What matters is that it is one you can do without thinking, because a wrap is a long piece of the same thing.
The simplest good choice is an open double crochet mesh: double crochet, chain one, skip one, repeated, with each row worked into the chain spaces of the row below. It is quick, it drapes, it uses less yarn than a solid fabric over the same area, and you are never hunting for a stitch top.
A dense textured stitch is the wrong direction here. A fabric like the alpine stitch makes a superb blanket precisely because it is thick and stable, and those are the two qualities a wrap should not have — it would hang like board and weigh twice as much.
- Chain an even number for your blocked width, plus two.
- Row 1: double crochet into the fourth chain from the hook, then chain 1, skip 1, double crochet to the end.
- Row 2: chain 3, turn. Double crochet into the first chain space, then chain 1, double crochet into the next space to the end.
- Repeat row 2 until the wrap is the length you want, measured relaxed rather than stretched out on your lap.
Leave the last few rows unworked if you are undecided about length. A wrap can always be lengthened before the border goes on and never afterward.
The Maple Leaf Motif
A crocheted maple leaf is worked in one piece, with the lobes built in rather than made separately and sewn together. The construction is a long foundation chain forming the central vein, single crochet worked back along it, and four side extensions worked off that spine to make the lobes.
The method
- Chain 12 for the central vein and stem.
- Work back along the chain in single crochet, stopping four chains short of the end — that tail becomes the stem.
- At the top of the vein, work a cluster to form the leaf’s point.
- The side lobes: work down one side of the vein, and at each of the two marked points chain out 6 to 8 stitches, turn, and work back along that chain to make a lobe. Rejoin to the vein and continue.
- Repeat on the other side so the lobes mirror.
- Work a final round of single crochet all the way round the leaf, including the lobes, to even out the edge.
Work the final round in back loop only. That leaves the front loops visible as a raised outline around the whole leaf, which is what makes a crocheted leaf read as a leaf rather than a blob.
Size and yarn
Medium-weight yarn on a 3.5 to 4.0 mm hook gives a leaf that holds its shape. Published maple leaf patterns run from thread to worsted, and the same instructions produce anything from a 2-inch leaf to a 5-inch one depending only on the yarn.
Aim for 3 to 4 inches across on a standard wrap. Smaller and the lobes disappear into the mesh; larger and the leaf starts to look like a separate object resting on the fabric.
Making them look natural
Three colours, and vary them within leaves as well as between them. Changing colour partway through a single leaf — rust at the stem running into gold at the tips — mimics how a real leaf turns, and two or three leaves treated that way lift the whole piece.
Make more leaves than you need. They are twenty minutes each, and choosing twelve from eighteen gives a better arrangement than making exactly twelve and using all of them.
Blocking the Leaves, Separately and First
Block every leaf flat before any of them go near the wrap. Pin each one out damp with the lobes spread and the point pulled straight, and let it dry completely.
An unblocked crocheted leaf curls at the lobe tips. Attached in that state the curl is permanent, and no amount of blocking afterward will fix it, because the leaf is now sewn to a fabric that will not stretch the same way.
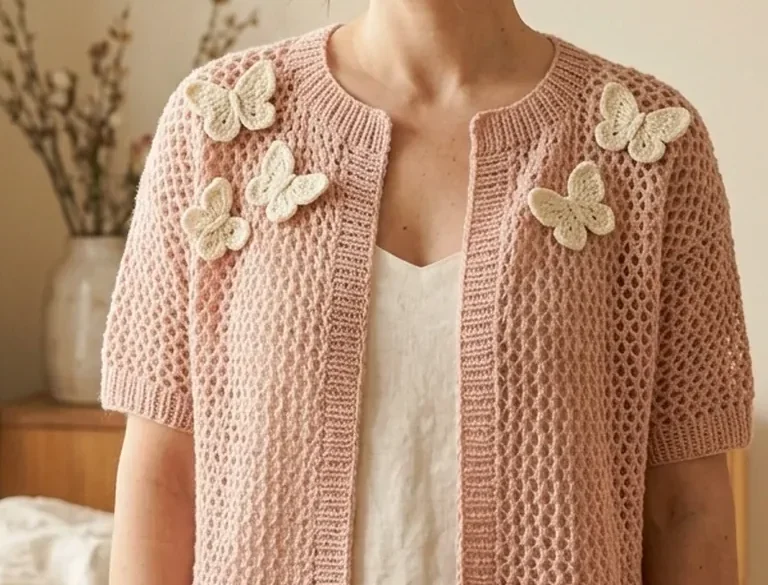
This is the same sequence that makes the appliqués sit flat on a blush butterfly cardigan: motif first, blocked, then attached. Doing it in the other order is the most common way a motif-trimmed garment ends up looking homemade.
Placing the Leaves
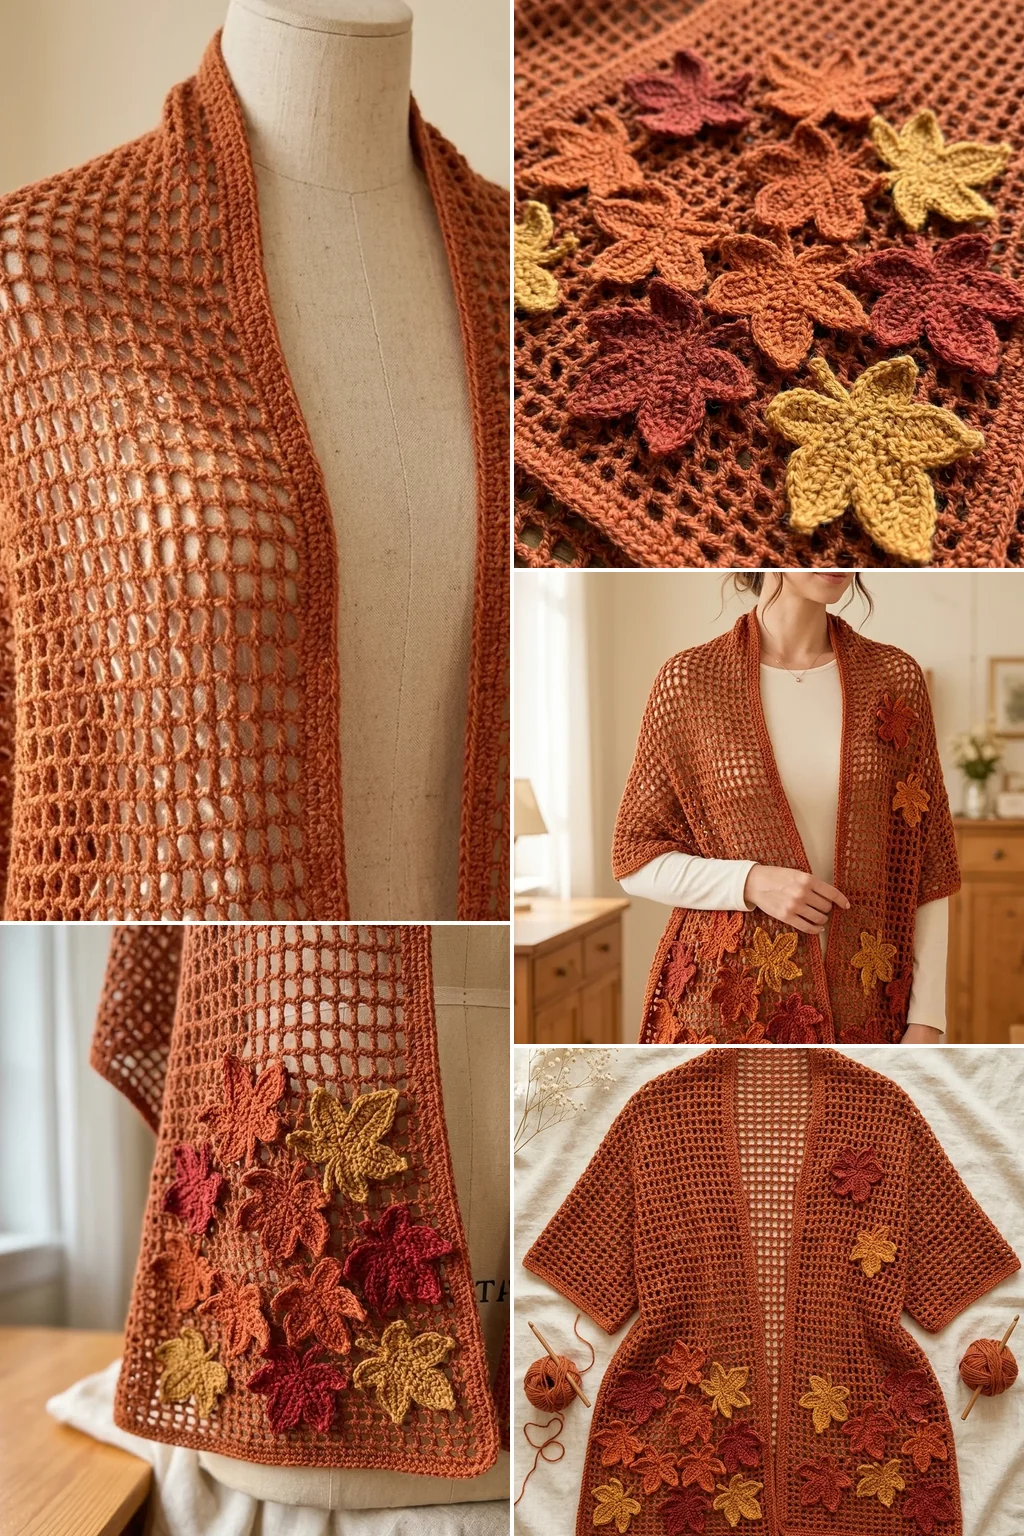
Lay the blocked wrap flat and put every leaf on it before sewing a single stitch.
Weight one end. The strongest arrangement puts most of the leaves across one end of the wrap, thinning out as they travel up the body. Both ends equally covered reads as a border; one end weighted reads as leaves that fell there.
Use an odd number. Nine, eleven, thirteen. Even numbers invite the eye to pair them up and find the arrangement wanting.
Vary the angle. Every leaf pointing the same way looks like a print. Turn each one differently, and let two or three sit at the edge so they overhang it — a leaf cropped by the edge of the fabric suggests more beyond the frame.
Check it from across the room. Placement that looks balanced from two feet away often clusters badly from ten. Step back before you commit, and photograph it so you can rebuild the arrangement after you start sewing.
Attaching Them Without Distorting the Mesh
An open fabric is different from a solid one, and most of the avoidable mistakes happen here.
Stitch into the motif, not through the mesh
Catch the outer edge of the leaf and only as much of the wrap’s fabric as is needed to hold it. Stitches taken through the open spaces of the mesh pull the holes out of shape, and the distortion radiates outward around every leaf.
Sew with thread, not yarn
Sewing thread matched to each leaf, with a sharp needle. Yarn stitches sit proud of the surface on an openwork join and read as a repair rather than a join.
Anchor at several points
A leaf attached only at its base rotates over a few wearings until it hangs at an angle. Stitch along the central vein and again at two or three lobe tips, so each leaf has four anchor points rather than one.
Pin with bold heads
On an open mesh a fine pin slips through and vanishes into the fabric, and you find it later with a fingertip. Large coloured heads only.
Keep knots on the back
Start and finish every thread on the reverse, and weave the tails into the leaf rather than the wrap. A knot on the face of an open fabric has nothing to hide behind.
Borders and Finishing
An open mesh needs an edge or it curls along both long sides from the first wearing.
Work two rounds of single crochet all the way round the wrap, putting one stitch in each stitch along the short ends and two stitches into the end of each row along the long sides. That two-to-one ratio along the rows is what keeps the sides from pulling in.
After that, a picot round if you want one: single crochet, single crochet, chain 3, slip stitch into the first of those chains, repeated. On a wrap this size, keep the picots small — a deep decorative edge adds weight at the very point where the fabric is least supported.
Fringe is optional and worth thinking about twice. It looks good on a wrap and it tangles in everything, and on a piece already carrying fifteen leaves the two features compete.
Blocking the Finished Wrap
Wet the whole thing, roll it in a towel to take out the water, and pin it out to the measurements you worked to.
Pin the long sides straight first, then the ends square, then work along the edges adjusting until nothing bows. A wrap pinned only at the corners dries with curved sides, and on a 70-inch piece a slight curve is visible from across a room.
Leave it until completely dry, which on a wrap this size can take a full day. Lifting it damp undoes the whole job.
12 Rust Maple Leaf Wrap Ideas
1. Classic Rust with Three-Tone Leaves
The version above. Rust mesh body, twelve leaves in rust, burnt orange and gold weighted toward one end.
Put the gold leaves where the light falls when the wrap is worn — across the shoulder rather than the hem.
Advanced beginner · 16 hours · 950 yds
2. Cream Body, Autumn Leaves
A cream or oatmeal wrap with the leaves carrying all the colour. The leaves read far more strongly against a pale ground.
Use fewer leaves — nine rather than twelve. High contrast needs less of it.
Advanced beginner · 16 hours · 950 yds
3. Tonal Rust on Rust
Leaves two shades deeper than the body. Subtle enough to read as texture from a distance and reveal themselves close up.
Go two shades darker, not one. A single shade disappears entirely against an open fabric.
Advanced beginner · 16 hours · 950 yds
4. Scattered Across the Whole Wrap
Fifteen smaller leaves distributed evenly rather than weighted to one end. Reads as a print rather than a drift.
Make them 2 to 3 inches rather than 4. Large leaves spread thin look sparse.
Advanced beginner · 18 hours · 1,000 yds
5. Leaves Along One Long Edge
A single line of leaves running the length of one side, so they frame the face when the wrap is worn open.
Attach these more firmly than scattered ones. An edge leaf catches on everything.
Advanced beginner · 16 hours · 950 yds
6. Winter Version in Ivory and Silver
The same construction with ivory leaves on a soft grey body. Takes the shape into December without the autumn palette.
Skip the colour change within leaves. Tonal shifts need warm colours to read.
Advanced beginner · 16 hours · 950 yds
7. Travel Blanket Size
At 26 by 80 inches, large enough to sit under. The leaves move to the corners so they do not sit under you.
Go up to aran for this one. A blanket wants body more than drape.
Advanced beginner · 24 hours · 1,400 yds
8. Beaded Leaf Veins
A line of small bronze beads sewn along the central vein of each leaf.
Bead after blocking, not before. Beads distort under blocking pins and end up crooked.
Intermediate · 18 hours · 950 yds
9. Mixed Leaf Shapes
Maple leaves mixed with simpler oak and birch shapes for variety in the scatter.
Keep them all the same scale. Mixed shapes work; mixed sizes read as a mistake.
Intermediate · 18 hours · 1,000 yds
10. Solid Fabric Version
A plain half double crochet body instead of mesh, for a warmer and more opaque wrap.
Add 250 yards. A solid fabric uses noticeably more than mesh over the same area.
Advanced beginner · 18 hours · 1,200 yds
11. Matching Leaf Brooch
One extra leaf on a brooch pin, used to fasten the wrap at the shoulder.
Sew the pin to a small backing circle first, then that circle to the leaf, or the pin tears through.
Beginner · 40 min · 30 yds
12. Child’s Size
A 12 by 44 inch version with five leaves, worked in a soft machine-washable blend.
Attach the leaves at every lobe. Anything sewn loosely onto a child’s garment comes off.
Advanced beginner · 8 hours · 450 yds
Common Problems and Fixes
The wrap came out wider than planned
The foundation chain was calculated from an unblocked swatch. Open fabric gains far more width than length when blocked. There is no fix short of restarting, which is why the swatch gets blocked first.
The long sides curl
No border, or only one round. Two rounds of single crochet with two stitches into the end of each row is what holds an open fabric straight.
The mesh pulls around a leaf
The stitches went through the open spaces rather than catching the leaf’s edge. Unpick that one and redo it — the distortion will not relax out.
The leaves curl at the lobes
They were attached unblocked. Unpick, block them damp and pinned overnight, and re-attach. Wool takes a block permanently so it only needs doing once.
The arrangement looks wrong and I cannot say why
Usually an even number, or every leaf at the same angle. Both make the eye look for a grid and find a flawed one.
The wrap slides off my shoulders
Too short, or too slippery a fibre. Measure wrist to wrist across the shoulders; anything shorter has to be held. A wool blend grips where pure cotton and silk do not.
The leaves lift at the edges after wearing
Too few anchor points. Each leaf needs the vein plus two or three lobes stitched, not just the base.
Washing and Keeping Its Shape
Hand wash in cool water with a little wool wash. Squeeze rather than wring, and press the water out between towels.
Dry flat, pinned out to size. A wrap hung wet stretches lengthways under its own weight and does not come back — on a piece already 70 inches long, that turns a wrap into something that trails on the floor.
The leaves want re-pinning after each wash. Five minutes while the piece is damp keeps them flat for the next season.
Store it folded rather than hung, with the leaves facing inward so nothing catches them.
Frequently Asked Questions
How much yarn does a maple leaf wrap take?
About 950 yards of DK for an 18 by 70 inch wrap, plus roughly 30 yards per leaf colour. A travel blanket size runs to 1,400.
What size should a crochet wrap be?
Around 14 to 20 inches wide and 60 to 80 long for a wearable wrap. Measure wrist to wrist across your shoulders for the length that stays on without being held.
Do I have to block the swatch?
Yes. Open crochet relaxes substantially when blocked — published wraps gain nearly a third in width — and a chain calculated from an unblocked swatch gives a wrap several inches too wide.
How many leaves do I need?
Nine to fifteen depending on size, and always an odd number. Make more than you need and choose between them.
What yarn makes the best wrap?
A DK or sport wool blend on a hook one or two sizes larger than the band suggests. Lighter yarn and a bigger hook give drape; heavier yarn gives a blanket.
Should I sew the leaves on with yarn or thread?
Sewing thread matched to each leaf, with a sharp needle. Yarn sits proud on an open fabric and reads as a repair.
Why do my leaves curl?
They were attached before blocking. Block each leaf flat and let it dry fully before it goes anywhere near the wrap.
Can a beginner make this?
Yes. The wrap is one repeated row with no shaping. The leaves need a little more attention, but they are small and quick enough to practise on.
Rectangle or triangle?
Rectangle for this project. The row length never changes, you can stop when it is long enough, and motifs need a flat area to sit on.
How long does the whole thing take?
Fourteen to twenty hours. The leaves are about twenty minutes each and the wrap itself is the long part.
Final Thoughts
Block the swatch before you chain anything. It is the one step that decides the finished width, and open crochet relaxes enough that skipping it reliably produces a wrap several inches wider than intended.
Make the leaves last, not first. The wrap tells you how many you need and where they look right, and both answers change with the size you end up at. Lay them all out, photograph the arrangement, and only then pick up a needle.