 Clara•🕑 October 9, 2026•💬 No comments
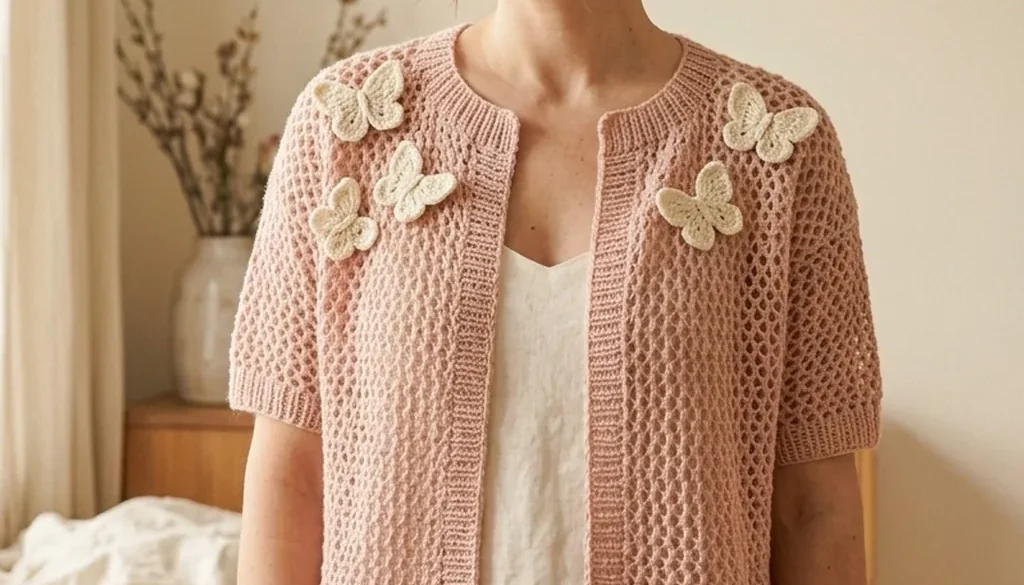
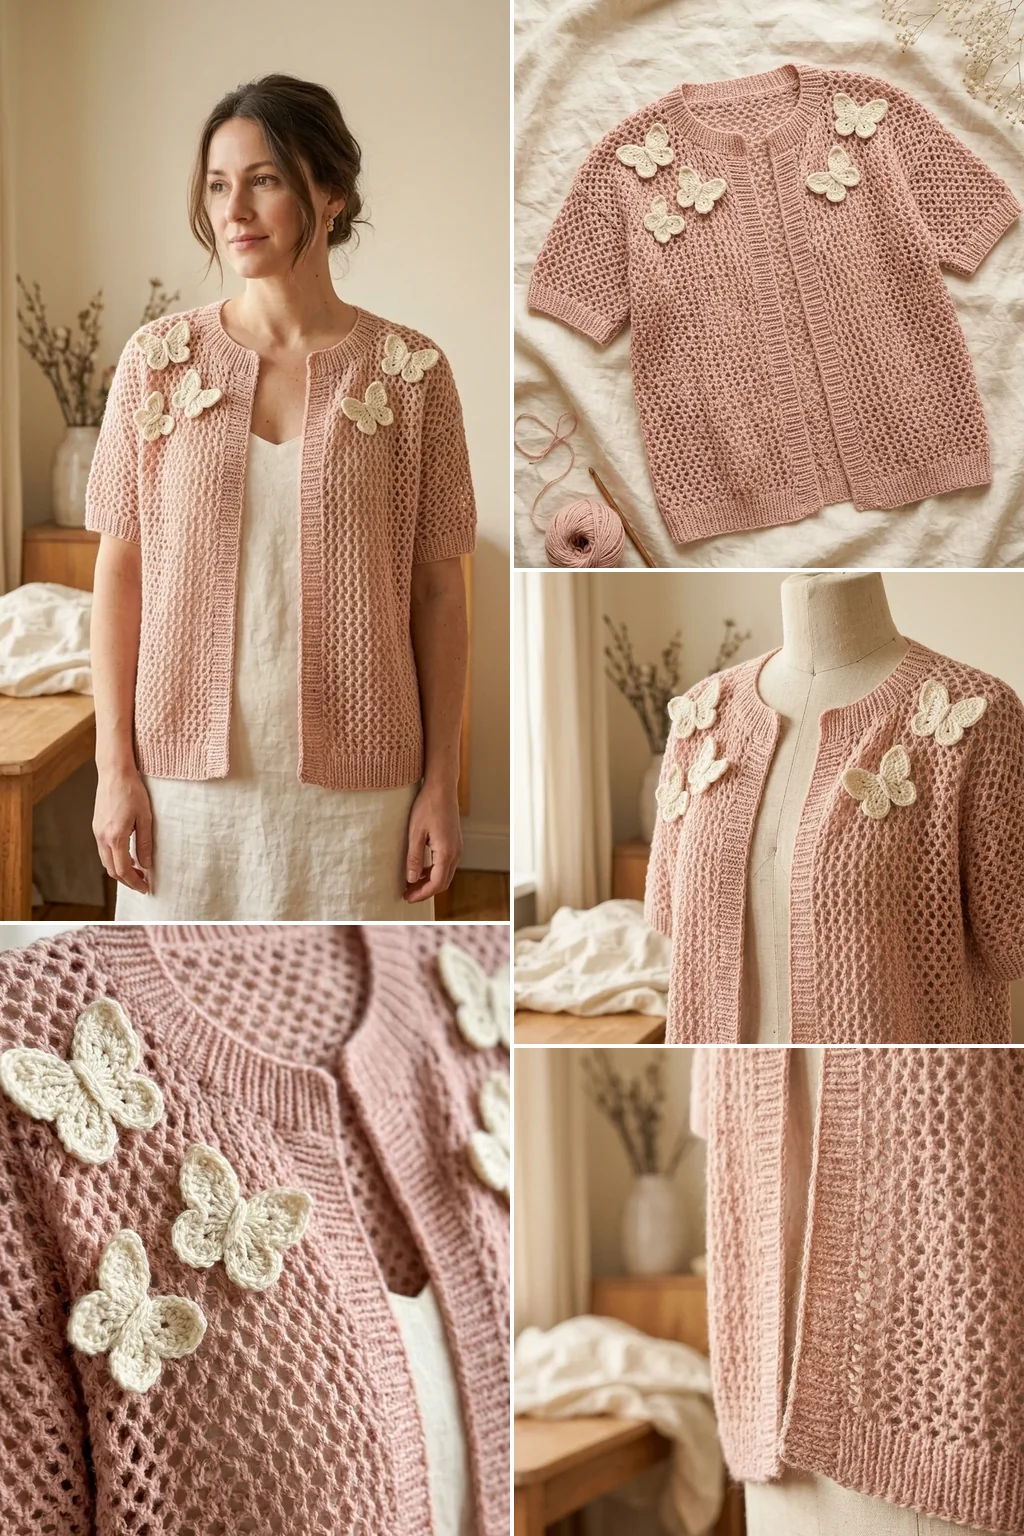
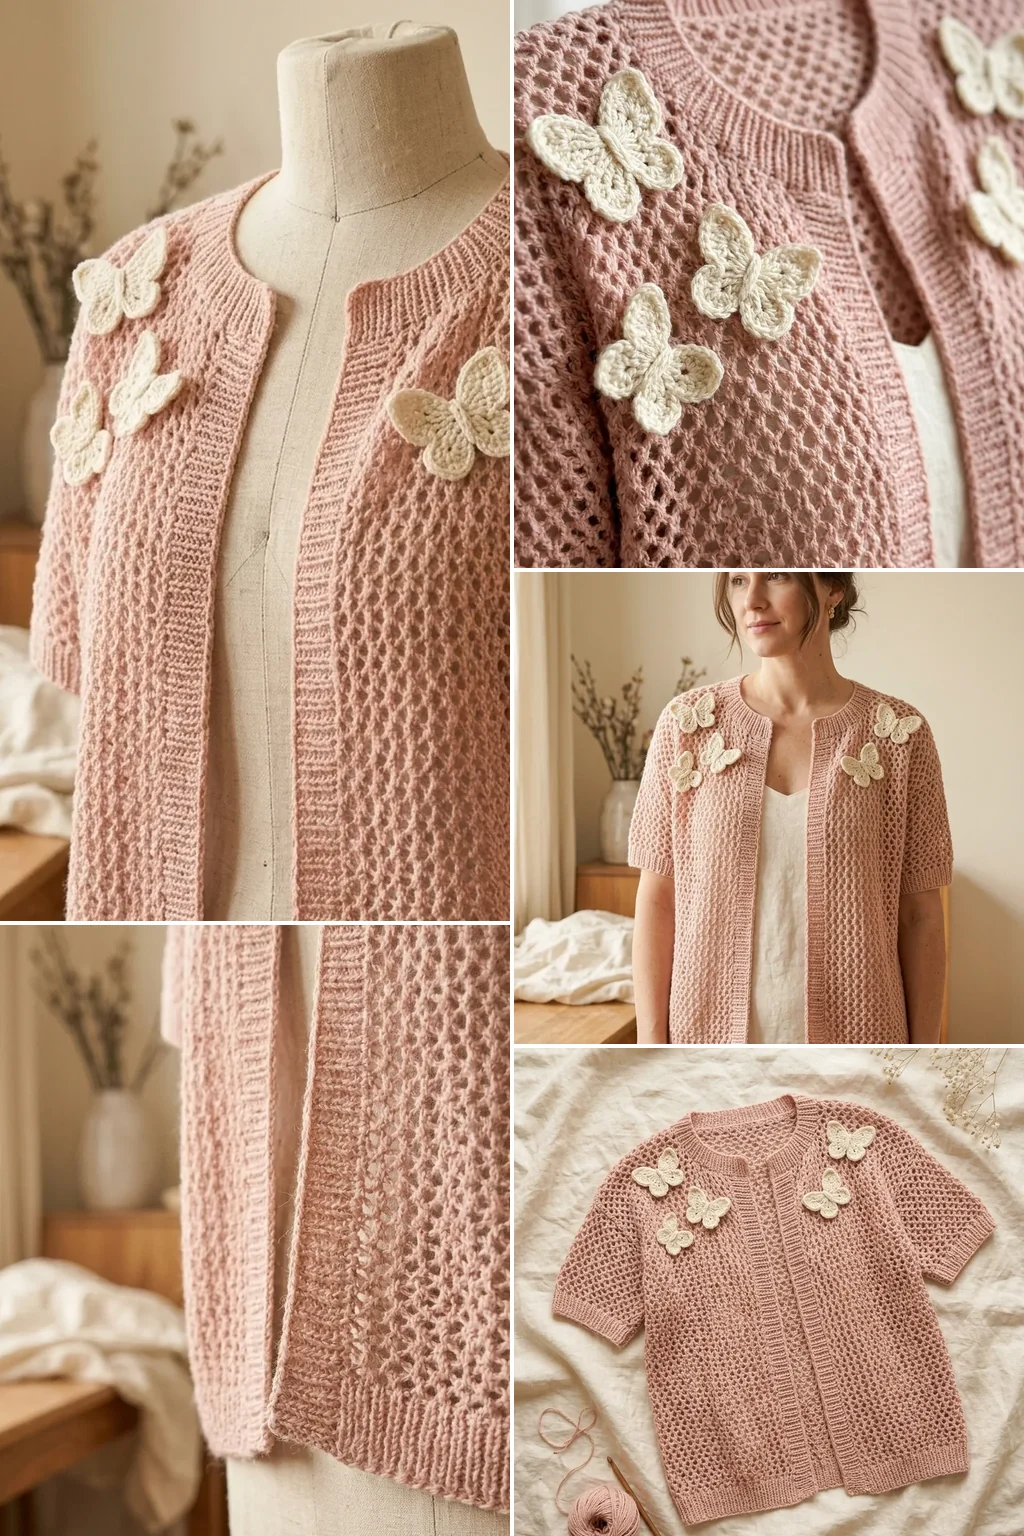
A blush butterfly cardigan crochet pattern is the project that makes people ask where you bought it. The cardigan itself is an open mesh — about as simple as crochet garments get, with no shaping beyond the armholes. All the character comes from the butterflies, and those are made separately, blocked flat, and sewn on at the very end. That separation is what makes the project approachable: you can crochet the whole cardigan in front of the television, then do the decorative work when you have twenty quiet minutes.
Blush Butterfly Cardigan at a Glance
- Skill level: confident beginner — mesh body, appliqué finishing
- Time: 12–18 hours for the cardigan, 20 minutes per butterfly
- Yarn:
900–1,400 yardsof DK cotton, plus scraps for the motifs - Hook:
4.0 mmfor the body,3.0 mmfor the butterflies - Butterflies: 5–9, depending on placement
- Construction: two fronts, one back, two sleeves, seamed at the end
Materials
- DK cotton in blush pink — roughly 1,100 yards for a size M
- Cream DK cotton scraps for the butterflies, about 10 yards each
- 4.0 mm hook for the mesh body, 3.0 mm for the motifs
- Sharp sewing needle and matching thread for attaching the butterflies
- Bold-headed pins — the kind you can see at a glance
- Blocking mat and pins, tapestry needle, scissors
- Five to nine small buttons, if you want it to fasten
Cotton rather than acrylic. A mesh cardigan hangs from the shoulders with nothing but air below it, and acrylic stretches under its own weight — the hem ends up two inches lower than the day you finished it. Cotton holds its length.
Quick Overview
Worked flat in five pieces: two fronts, one back and two sleeves, all in a simple mesh. The pieces are seamed, the bands added, and the butterflies made separately and sewn on last. Nothing is shaped except the armholes.
Choosing the Blush
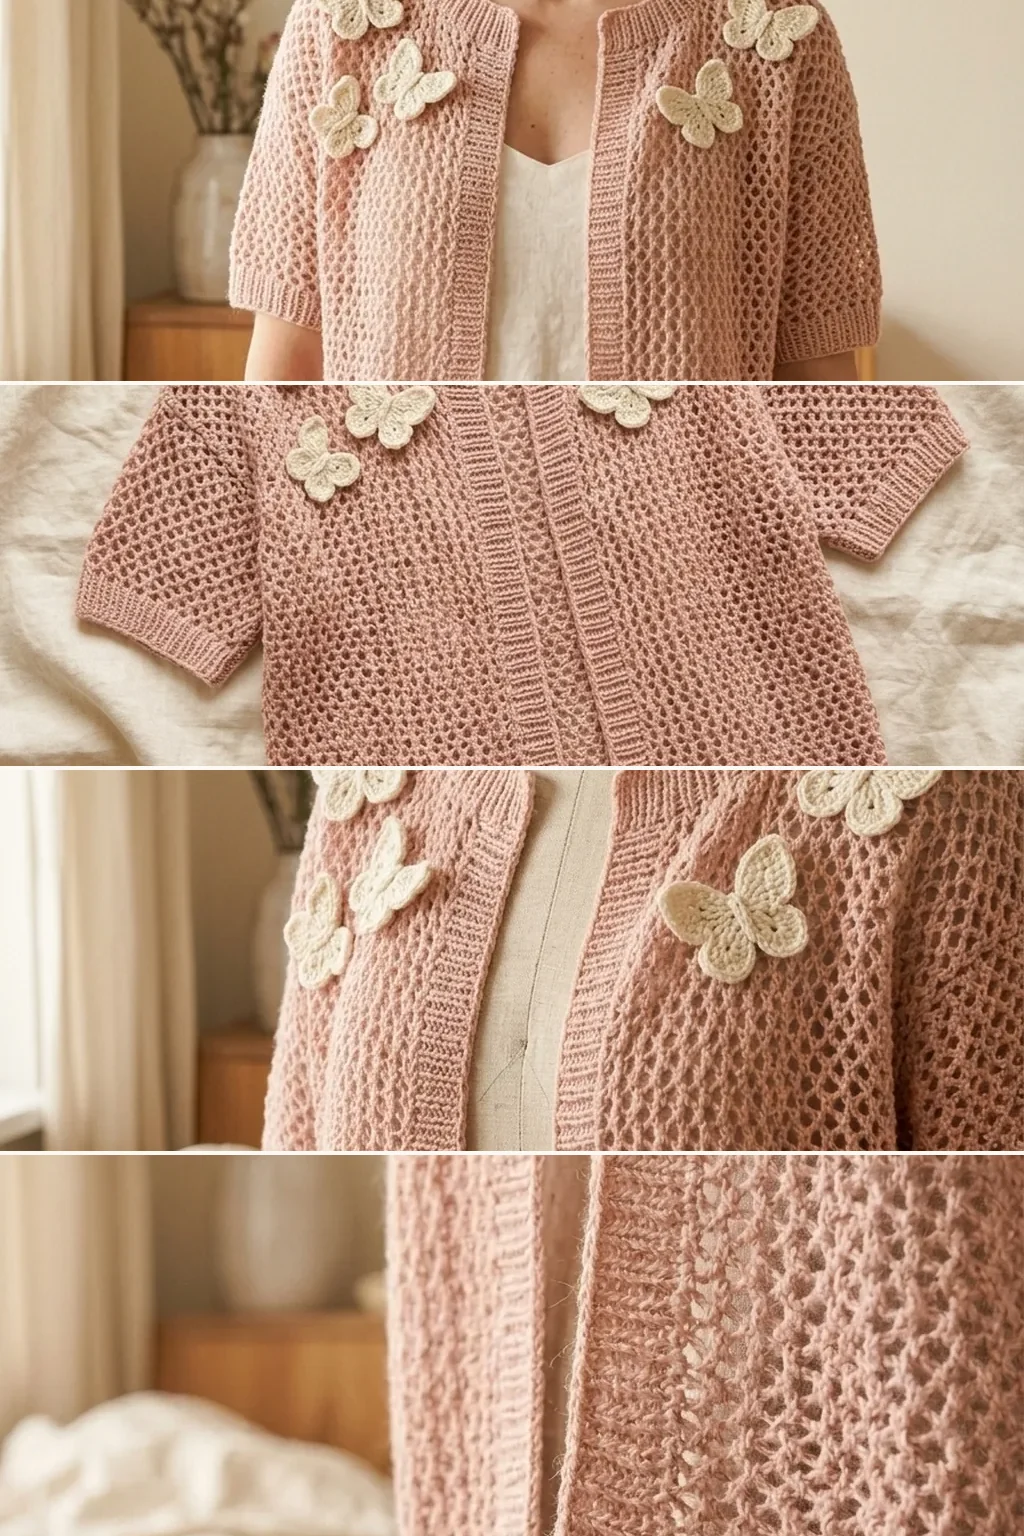
Blush covers a wide range, and the two ends of it behave differently on a mesh. A warm, peachy blush reads as summer and sits well against cream; a cooler, greyed blush reads closer to dusty rose and takes a sharper white. Hold the ball against the yarn you intend to use for the butterflies in daylight before buying either in quantity, because an open fabric shows the colour of whatever is behind it and the two yarns will sit directly against each other.
Buy all the body yarn in one dye lot. On a solid fabric a lot change is often invisible; on a mesh, where each row is a thin line of colour with light behind it, a half-shade shift shows as a horizontal band across the back. If you do end up short and have to open a second lot, work the remaining rows alternating one row from each ball for four rows, which blurs the transition into something nobody will find.
Why the Mesh Comes First
Most people want to crochet the butterflies first. Do the opposite.
The cardigan determines how many butterflies you need and where they go. A finished mesh front tells you immediately whether five butterflies look sparse or nine look crowded, and a size L needs more than a size S to read the same way. Making nine in advance and discovering you want six means three wasted evenings.
It also means the fiddly decorative work comes at the end, when the project is nearly finished and motivation is highest, rather than at the start when the cardigan is still fourteen hours away.
The Mesh Body
The stitch
A basic mesh: double crochet, chain one, skip one, repeat. Each row works into the chain spaces of the row below, which means you are never hunting for a stitch top.
- Chain an even number for your width, plus 3 for the turning chain.
- Double crochet into the fifth chain from the hook.
- Chain 1, skip 1, double crochet into the next. Repeat to the end.
- Chain 3, turn. Double crochet into the first chain space, then chain 1, skip, double crochet into the next space. Repeat.
Every row after the first is identical, which is what makes this a television project.
Gauge, and why it matters less here than usual
Work a swatch of about 20 stitches by 10 rows, wet it, pin it flat and let it dry before measuring. Mesh relaxes when it gets wet, and a dry swatch will read two or three stitches tighter than the garment ever will. On a 4.0 mm hook with DK cotton you should land near 14 mesh spaces and 8 rows to 4 inches.
If your gauge comes out different, you do not need to change hooks. This garment is measured in inches, not stitches, so you simply chain until the piece is the width you want and stop. Note the number of mesh spaces your own swatch gives you per inch, multiply by the back width in the table below, and that is your starting chain.
The one number you should not ignore is drape. Hold the dry swatch up by one corner. If it stretches noticeably under its own small weight, the finished cardigan will stretch far more under its own, and you want a half size smaller hook before you commit to 1,100 yards.
Sizing without a pattern
| Size | Bust | Back width | Front width (each) | Yarn |
|---|---|---|---|---|
| XS–S | 32–35 in | 18 in | 9 in | 900 yds |
| M | 36–38 in | 20 in | 10 in | 1,100 yds |
| L | 39–42 in | 22 in | 11 in | 1,250 yds |
| XL | 43–46 in | 24 in | 12 in | 1,400 yds |
The two fronts together are slightly narrower than the back, which gives the open front its drape. Length is personal: 22 inches from shoulder sits at the hip, 26 inches sits below it.
Armholes
The only shaping in the whole garment. At the armhole, stop working the outer two mesh repeats on each side and carry straight up. That is it — no decreasing round a curve, no counting rows against a schematic.
Making the Butterflies
There are three common constructions, and they produce noticeably different results.
| Method | How it is built | Looks | Difficulty |
|---|---|---|---|
| Folded circle | A lacy 8-petal circle folded in half | Soft, rounded wings | Easiest |
| Two hearts | A small and a large heart per side | Defined upper and lower wings | Moderate |
| Four pieces | Each wing worked separately, then joined | Crispest, most sculptural | Hardest |
The folded circle method
The one to start with. Work a lacy circle with eight petals in the round, fold it in half so four petals sit above four, then add a body down the centre — a short chain, or a chenille stem if you want the antennae to hold a shape.
Twenty minutes each once the rhythm is there, and they are small enough to carry in a bag.
The two-heart method
Two hearts per butterfly, one small and one large, joined back to back so the large pair becomes the upper wings and the small pair the lower. Each heart is a short row of increases worked into a ring, so it takes about the same time as half a folded circle.
The advantage is a defined wing shape that reads as a butterfly from across a room, which the folded circle does not always manage against a busy mesh. The disadvantage is four pieces of sewing per motif instead of one, and every join has to sit at exactly the same angle or the butterfly looks like it is banking into a turn. Pin all four pieces out together before joining, and join with the same thread you will use to attach it to the cardigan.
The four-piece method
Each wing worked separately and joined at a central body. Crispest of the three, with real sculptural edges, and the only method that lets you work the upper and lower wings in different colours — which is what makes the ombre and two-tone versions further down possible.
It is also the slowest by a wide margin, close to 45 minutes a motif once blocking and joining are counted. Make one before deciding to make seven. A cardigan with five folded-circle butterflies that are all finished beats one with two sculptural butterflies and a bag of unjoined wings.
Block them flat before anything else
This is the step that decides whether the finished cardigan looks handmade or homemade. Pin each butterfly out on a blocking mat, damp, with the wings spread evenly, and let it dry completely. An unblocked motif curls at the wing tips, and once it is sewn down that curl is permanent.
The aim is that the appliqué looks exactly the same after attaching as it did before.
Seaming and the Border
Five rectangles become a cardigan in about an hour. Seam the shoulders first, with the right sides together and a whip stitch through the top of each mesh post rather than through the open spaces — a seam worked through the holes stretches, and shoulders are the one place on this garment that carry weight.
Then the side seams, from hem to armhole, leaving the armholes open. Leave the last inch at the hem unseamed on each side if you want a small vent; on a mesh cardigan it keeps the fronts from pulling together when you sit.
The border is not optional. Work three rows of single crochet up the right front, around the back neck and down the left front as one continuous piece, putting one single crochet into each mesh space and two into each corner. Those three rows do three jobs: they stop the fronts rolling, they give the neckline a defined edge, and they give you a solid band to sew a butterfly onto if you want one sitting on the front edge.
Finish the armholes the same way with two rows rather than three. One row is too little to stop the curl and four starts to flare.
Attaching Butterflies to Mesh
Sewing onto an open fabric is different from sewing onto a solid one, and most of the avoidable mistakes happen at this stage.
Stitch into the motif, not through the mesh
Work your stitches along the edge of the butterfly itself, catching only enough of the cardigan to hold it. Sewing through the open mesh distorts the holes around the motif and pulls the fabric out of shape — visible from several feet away.
Where you can, place each butterfly over a denser part of the fabric: near the band, over a seam, or along the yoke where the mesh is tighter.
Use sewing thread, not yarn
Yarn is the obvious choice and the wrong one here. A sharp needle with matching sewing thread disappears completely, where yarn stitches sit proud of the surface and read as a repair. Follow the outline of the motif with a small running stitch, tracing every curve rather than tacking at four points.
Pin with bold heads
Use pins with large coloured heads. On an open mesh a fine pin slips through and vanishes, and you find it later with a fingertip.
Keep knots and tails inside
Mesh is see-through. Every knot and every tail must finish behind the butterfly itself, where the motif’s own fabric hides it. A tail woven into the mesh shows from both sides.
Check the placement on a body
Pin all the butterflies, then put the cardigan on and look in a mirror before sewing anything. A layout that looks balanced flat on a table rarely looks balanced on shoulders, because the fronts hang and curve.
Placement That Works
Where the butterflies go matters more than how many there are.
| Placement | Butterflies | Effect |
|---|---|---|
| Scattered across the yoke | 5–7 | Soft, even, the safest choice |
| Clustered on one shoulder | 3–5 | Modern, asymmetric |
| Trailing down one front band | 5–9 | Draws the eye vertically, flattering |
| Along both sleeve hems | 4–6 | Subtle, visible only in movement |
| One on the back yoke | 1–3 | The detail nobody expects |
Odd numbers read better than even. Five scattered butterflies look considered; six look like a grid that went slightly wrong. The same rule applies to a cluster.
Common Problems and Fixes
The cardigan grew after a few wears
Acrylic, almost certainly, or a hook too large for the yarn. Mesh has nothing holding its length but the stitches themselves. Cotton at 4.0 mm in DK holds; anything looser will sag.
The mesh is pulling around a butterfly
The stitches went through the open mesh rather than into the motif edge. Unpick and redo that one — it will not relax out, and it is the difference between a cardigan that looks finished and one that looks patched.
The butterflies curl at the tips
They were not blocked, or not blocked long enough. Unpick, re-block damp and pinned overnight, and re-attach. Cotton takes a block permanently so it only needs doing once.
The front edges roll
Mesh needs a border. Three rows of single crochet down each front and around the neckline gives the edge enough body to hang straight. Without it the fronts curl inward from the first wearing.
The shoulders are too wide
A common problem with unshaped garments. Seam the shoulders an inch further in on each side; the armhole drops slightly, which on a mesh cardigan reads as intentional.
The butterflies look like they are sliding off
Almost always a placement problem rather than a sewing one. A motif attached at a single point on its body will rotate slowly over a few wearings until it hangs at an angle. Attach along the whole lower edge of each wing as well as the body, so the butterfly has three anchor points instead of one.
The thread shows through the wings
The thread is a shade off, or the stitches are too long. Hold the thread against the motif in daylight rather than under a lamp, and keep each stitch to about an eighth of an inch. Long stitches show on an open motif because there is nothing behind them to hide against.
One front is longer than the other
Mesh rows are quick to miscount because every row looks identical. Lay both fronts flat on top of each other before seaming and compare — if one is a row or two short, add to it then, while it is still a free rectangle. After seaming, the only fix is unpicking a side seam.
12 Blush Butterfly Cardigan Ideas
1. Classic Blush with Cream Butterflies
The version above exactly — blush mesh, five cream butterflies scattered across the yoke. The combination that suits the widest range of what is already in a wardrobe.
Work the butterflies in the same yarn as the bands rather than a third colour, and the whole thing reads as designed.
Beginner · 15 hours · 1,100 yds
2. Tonal Blush on Blush
Butterflies in a deeper rose than the cardigan. Subtle enough that they read as texture from a distance and reveal themselves close up.
Go two shades darker, not one. A single shade’s difference disappears entirely against an open mesh.
Beginner · 15 hours · 1,100 yds
3. Cropped Butterfly Cardigan
The same construction at 16 inches long, sitting at the natural waist. Uses a third less yarn and suits high-waisted trousers.
Keep the butterflies on the yoke. On a cropped body there is no room for a trailing placement.
Beginner · 10 hours · 750 yds
4. Long Sleeve Version
Full-length sleeves in the same mesh, with butterflies at both cuffs. The cuffs are where people notice them, because hands move.
Add two inches to the sleeve length. Mesh sleeves ride up more than solid ones.
Beginner · 18 hours · 1,350 yds
5. Ombre Butterfly Cluster
Butterflies graduating from cream at the shoulder to deep rose at the hem, trailing down one front.
Lay them all out before sewing any. An ombre that steps unevenly is obvious and unfixable once stitched.
Intermediate · 16 hours · 1,150 yds
6. Beaded Butterfly Cardigan
A small pearl bead at the centre of each butterfly where the body meets the wings.
Sew the beads on after blocking, not before. Beads distort under blocking pins and end up sitting crooked.
Intermediate · 16 hours · 1,100 yds
7. Sage and Cream Colourway
The same cardigan in soft sage with cream butterflies. Reads as spring rather than summer and pairs with more of a winter wardrobe.
Sage needs a slightly denser mesh to avoid looking washed out — drop to a 3.5 mm hook.
Beginner · 15 hours · 1,100 yds
8. Butterfly and Flower Mix
Alternating butterflies with small five-petal flowers across the yoke. The flowers are faster, so the overall decoration takes less time than butterflies alone.
Keep them the same size. A flower noticeably smaller than its neighbouring butterfly looks like an afterthought.
Intermediate · 16 hours · 1,150 yds
9. Open Front, No Buttons
Skip the buttonholes entirely and wear it open. Saves an hour and suits the drape of mesh better than a fastened front.
Widen the front bands to four rows instead of three. Without buttons the bands are the only structure at the front edge.
Beginner · 14 hours · 1,050 yds
10. Childs Butterfly Cardigan
The same construction scaled down, with three butterflies rather than seven. A quarter of the yarn and about five hours.
Use smaller butterflies too — a full-size motif on a child’s yoke looks like a brooch.
Beginner · 5 hours · 400 yds
11. Butterfly Shrug
Just the sleeves and a back panel, no fronts at all. The simplest version here and the fastest route to wearing butterflies.
Work it as one rectangle folded and seamed at the sleeves — no shaping anywhere.
Beginner · 8 hours · 600 yds
12. Evening Version in Metallic Thread
Butterflies worked with a fine metallic thread held alongside the cream cotton. Catches light under evening lighting.
Hold the metallic for the butterflies only, never the body. A whole mesh cardigan in metallic is scratchy to wear and miserable to work.
Intermediate · 16 hours · 1,100 yds
Washing and Keeping Its Shape
Mesh and appliqué together need slightly more care than plain crochet, though not much.
Hand wash in cool water and never wring it. Squeeze the water out in a towel, then dry flat with the fronts aligned and the butterflies lying as they should. A mesh cardigan hung wet stretches lengthways and the shoulders go first.
Check the appliqué stitching once a season. A butterfly worked loose is a two-minute repair caught early and a lost motif caught late.
Store it folded rather than hung. On a hanger the shoulders carry the whole weight through an open fabric, and over a year that shows.
Frequently Asked Questions
How much yarn does a butterfly cardigan take?
About 1,100 yards of DK cotton for a size M, plus roughly 10 yards per butterfly. Mesh uses noticeably less than a solid fabric at the same dimensions.
What yarn is best for a mesh cardigan?
DK cotton. Mesh hangs from the shoulders with nothing supporting it, and acrylic stretches permanently under its own weight.
Should I make the butterflies first or last?
Last. The finished cardigan tells you how many you need and where they look right, which changes with size and with how you wear it.
How do I attach appliqués without distorting the mesh?
Stitch along the edge of the motif itself, catching only enough fabric to hold it, and place each butterfly over a denser area where you can. Sewing through open mesh pulls the holes out of shape.
Should I sew with yarn or thread?
Sewing thread and a sharp needle, matched to the motif. Yarn stitches sit proud of the surface and read as a repair rather than a finish.
Do the butterflies need blocking?
Yes, before attaching. An unblocked motif curls at the wing tips, and once it is sewn down that curl cannot be corrected.
How many butterflies should I use?
Five to seven scattered across the yoke for a standard cardigan, and always an odd number. Even numbers read as a grid that has gone slightly wrong.
Can I make this without a pattern?
Yes. It is five rectangles — two fronts, a back and two sleeves — in a mesh with no shaping beyond the armholes. The size chart above gives the widths.
Why do the front edges curl?
Mesh needs a border. Three rows of single crochet down each front and around the neck gives the edge enough body to hang straight.
How long does the whole project take?
Twelve to eighteen hours for the cardigan, plus twenty minutes per butterfly and an overnight block. Realistically a fortnight of evenings.
Final Thoughts
Make one butterfly and block it before starting the cardigan. Twenty minutes tells you whether the motif size suits the mesh you are planning, and it gives you a blocked reference to hold against the finished front when you are deciding how many to make. Then crochet five rectangles without thinking about it, and save the butterflies for last.