 Clara•🕑 October 19, 2026•💬 No comments
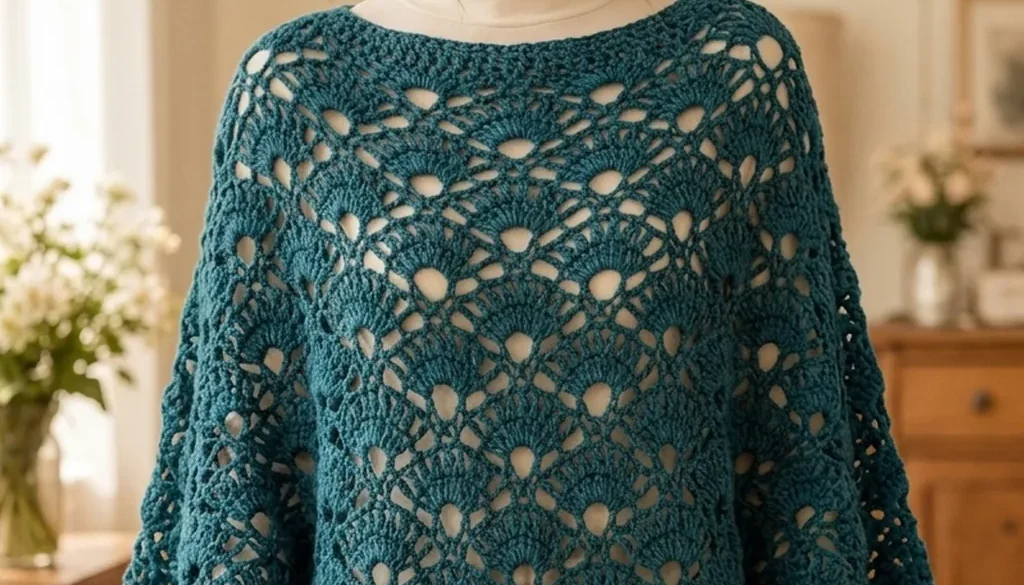
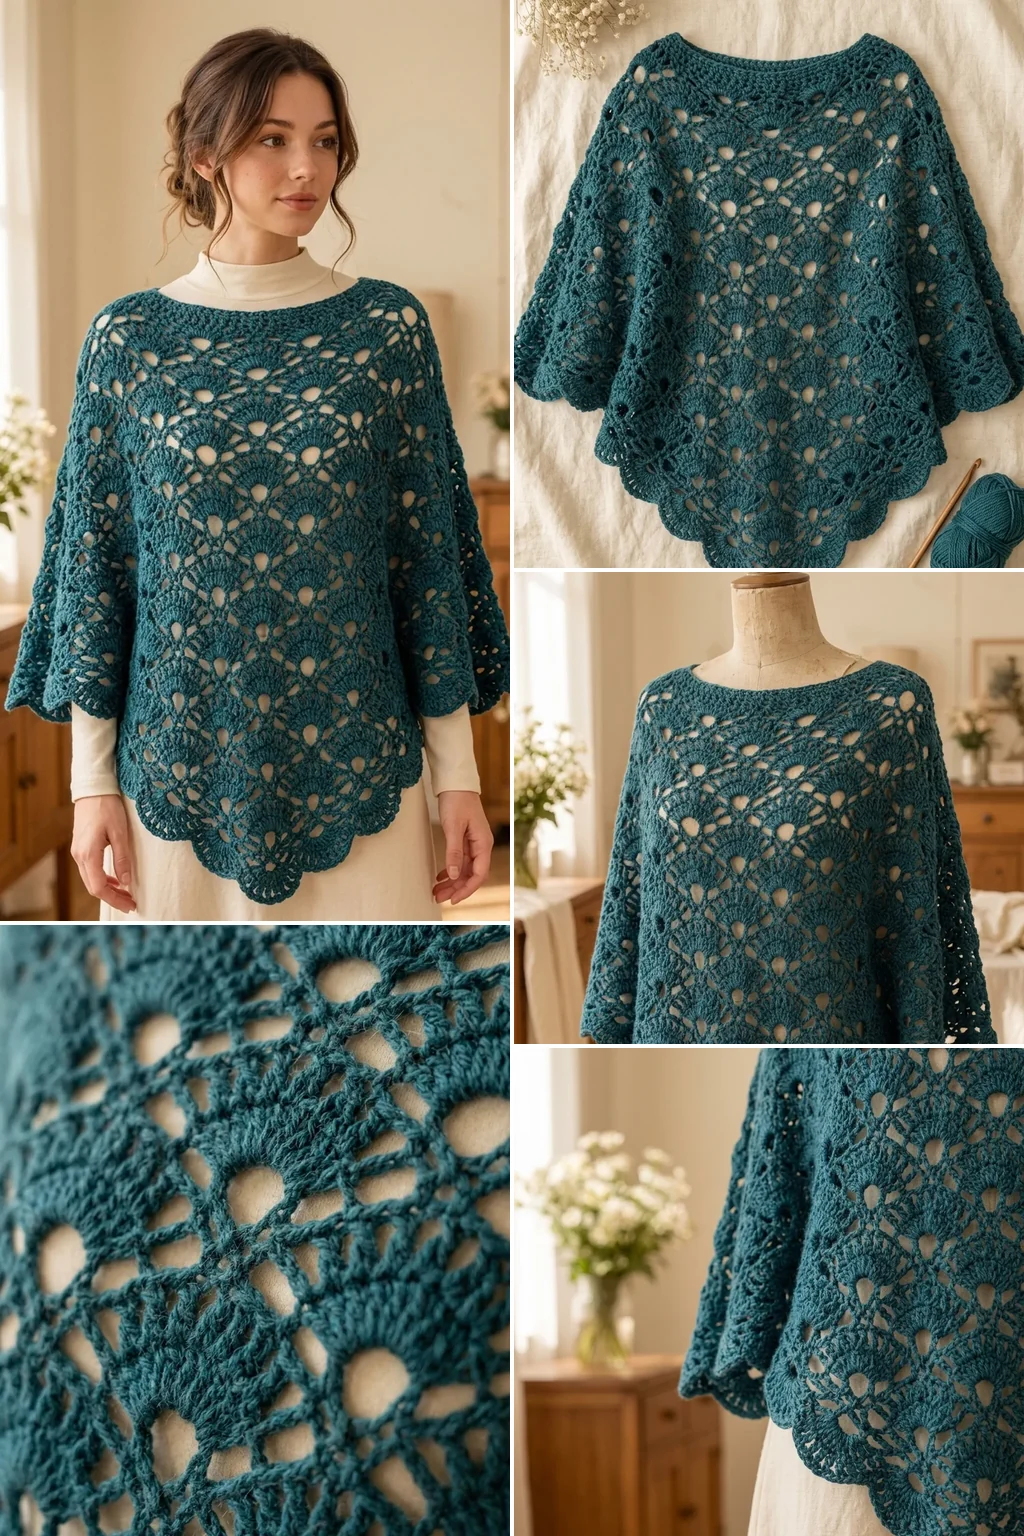
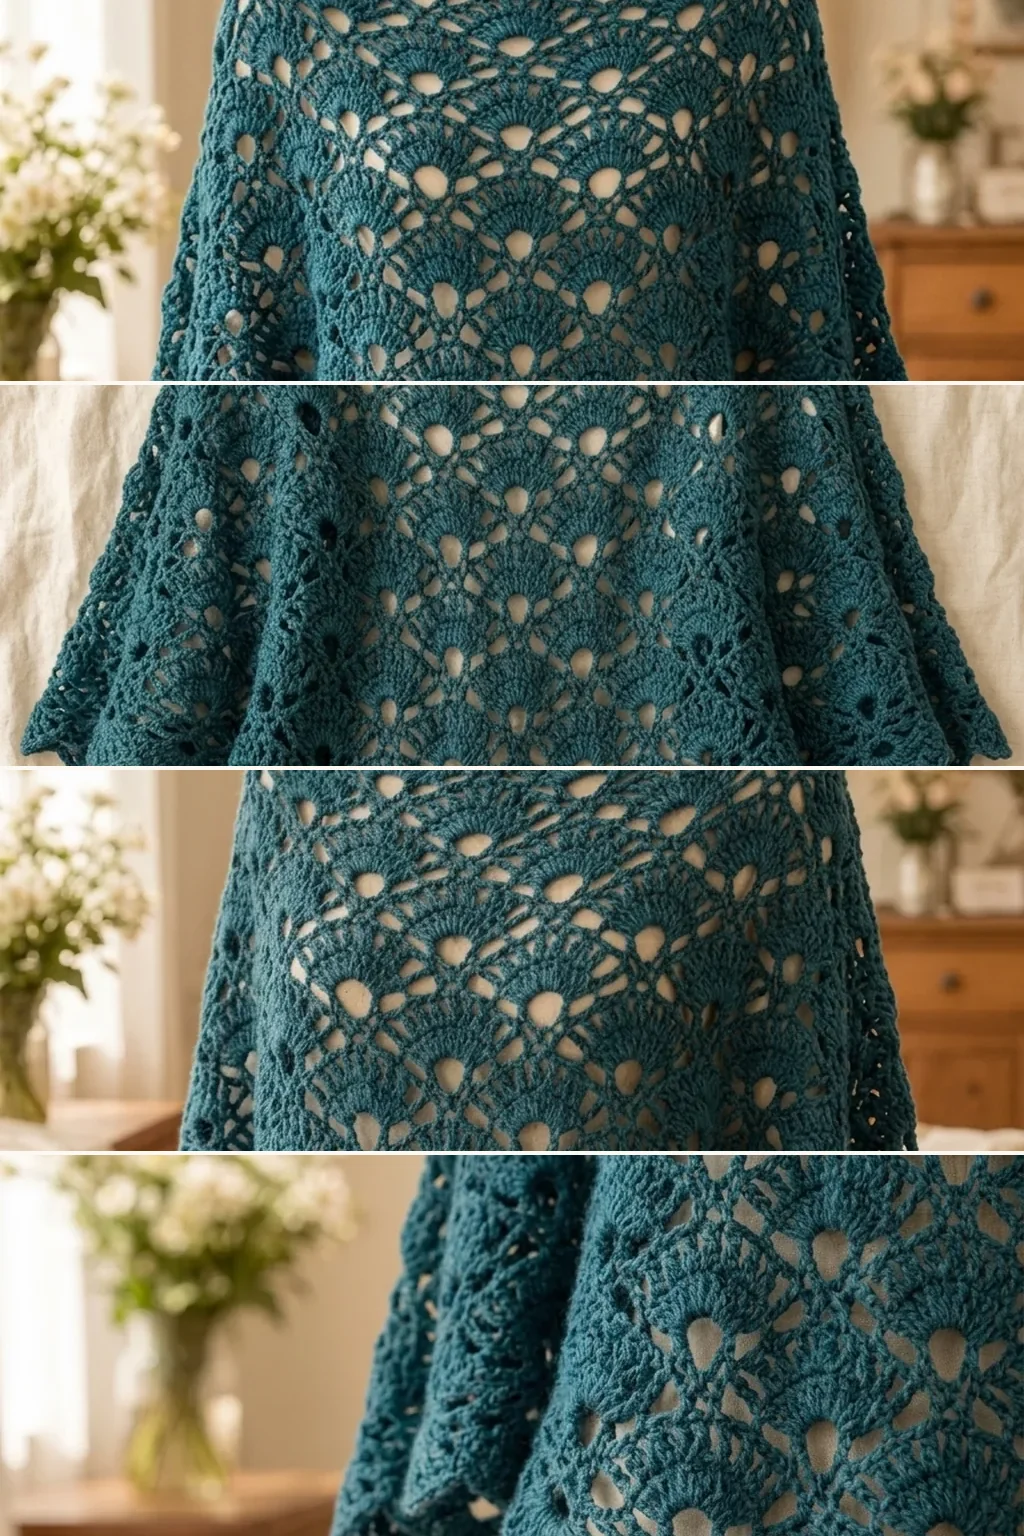
The peacock fan is a lace stitch that opens into wide arcs of nine treble crochets, stacked so each fan springs from the gap between the two below it. Worked in a solid colour it reads as feathers; worked in a gradient it reads as water.
It is also a stitch that suits a poncho better than almost anything else. A poncho is two rectangles with no shaping at all, so the fabric is the entire design, and a lace this open gives a garment that drapes instead of hanging like a board.
This is the peacock fan poncho crochet pattern: the stitch explained row by row, then the two rectangles and the one seam decision that changes the whole neckline.
Peacock Fan Poncho at a Glance
| Skill level | Confident beginner — needs sc and treble |
| Repeat | Two rows, after a set-up row |
| Foundation | A multiple of 10, plus 2 |
| Yarn | DK or worsted with drape |
| Hook | 5.5–6.0 mm |
| Construction | Two rectangles, one seam each side |
What the Peacock Fan Actually Is
Each fan is nine treble crochets worked into a single chain space. Nine stitches crowded into one point have nowhere to go but outward, so they splay into an arc — that splay is the whole effect.
Between the fans sit single crochets, which pull the fabric back in. Wide arc, narrow pinch, wide arc: that alternation is what makes the row read as a row of feathers rather than a wavy line.
The second thing that matters is where each fan sits. A new fan is built on the single crochet between two fans of the row below, so the arcs offset rather than stacking. Columns of fans directly above each other would read as stripes; offset, they interlock.
The fabric is open, light and uses far less yarn than a solid stitch over the same area. It has no right or wrong side worth worrying about, which on a poncho matters — both faces are on show when it moves.
The Stitch You Need First
Single crochet and treble crochet, and nothing else.
The treble is the tall one: yarn over twice, insert the hook, pull up a loop, then work off two loops three times. If you know double crochet, it is the same motion with one extra yarn over at the start and one extra pull-through at the end.
Work a dozen on a scrap before starting. Nine of them go into one space, and if the motion is still deliberate rather than automatic, the fans come out uneven in a way that shows.
The Multiple of 10, Plus 2
The foundation chain must be a multiple of 10 plus 2. Not approximately — exactly.
Each repeat consumes ten chains, and the extra two give the row its turning allowance and its final stitch. A chain that is not on the multiple runs out partway through the last fan, and the only remedy is to undo the whole row.
So 102, 112, 122, 132 chains and so on. Count twice before working row one, and put a marker every fifty chains while you count — on a poncho panel you are counting past a hundred and losing your place is the most likely thing to happen.
The Three Rows
A set-up row, then two rows repeated forever.
Row 1 — the set-up
Single crochet into the second chain from the hook. Then skip four chains and work nine treble crochets into the next chain. Skip four more and single crochet into the next. Repeat to the end, finishing with a single crochet.
Skipping four either side of each fan is what gives the nine trebles room to spread. The skipped chains are not wasted — they become the arc the fan sits on.
Row 2 — the spacer
Chain 3, turn. Work treble crochets separated by chain-3 spaces across the tops of the previous row’s fans, so each fan is capped by a row of evenly spaced posts.
This row does no decorative work. It converts the curved top of each fan into a flat run of anchor points for the row above, and without it the next set of fans has nothing level to grow from.
Row 3 — the offset fans
Single crochet into the space between the trebles of row 2, then work nine treble crochets into the next chain-3 space. Continue across.
The new fans land over the pinch points of the old ones. That is the offset, and it is the part worth checking after every row — if a fan sits directly above a fan, a count went wrong two rows back.
Then repeat
Rows 2 and 3, over and over, to the length you want. Finish on a row 3 so the panel ends on a row of fans rather than a row of bare posts.
Reading the Fabric
After three or four repeats the fabric tells you where you are, which matters on a panel this long.
- Looking at a row of arcs? The next row is the spacer.
- Looking at evenly spaced posts? The next row is fans.
- Unsure where a fan goes? Into the chain space that sits above the pinch between two fans below.
If you have lost your place mid-row, count the trebles in the last complete fan. Nine means you are fine; eight or ten means the error is there and not further back.
Gauge, Hook and Yarn
Hook size does more here than usual, because the fans need room to open. A 5.5 or 6.0 mm with DK or light worsted gives the arcs space; a hook that matches the yarn band compresses them into lumps.
Published fan-stitch swatches run from a 6.0 mm hook in a soft DK down to 2.0 mm in fine thread. The stitch works across that whole range — the hook sets the scale of the fan, not whether it works.
For yarn, pick something with drape and a smooth finish. A wool blend, bamboo blend or soft cotton all work. Avoid anything fluffy or heavily variegated: a halo fills in the gaps between the trebles and a busy colourway hides the arcs entirely, and the arcs are the only reason to use this stitch.
A dense textured fabric is the opposite of what a poncho wants. The alpine stitch makes an excellent blanket precisely because it is thick and stable, and a poncho worked in it would sit on the shoulders rather than fall from them.
The Two Rectangles
A poncho of this kind is two rectangles seamed with a hole left for the neck. There is no shaping anywhere.
Your foundation chain sets the width of each panel and the number of rows sets its height. Work both panels to the same measurements, counting the rows rather than measuring, so the fan rows line up when they meet at the seam.
| Size | Panel width | Panel height | Chain | Yarn |
|---|---|---|---|---|
| XS–S | 30 in | 20 in | 102 | 900 yds |
| M | 32 in | 21 in | 112 | 1,000 yds |
| L | 33 in | 22 in | 122 | 1,100 yds |
| XL | 35 in | 23 in | 132 | 1,250 yds |
Join along the foundation chain edges rather than the final rows. That way the panels can be lengthened later by adding rows to the free edge, which is the one alteration anyone actually wants to make to a finished poncho.
Working a Panel That Long Without Losing Count
A medium panel is 112 chains and roughly eleven fans per row. Over twenty inches of height that is a lot of counting, and the two mistakes that cost the most are both avoidable.
Mark every fan as you finish it. Not every tenth stitch — every fan. A removable marker through the centre treble of each completed fan means a miscount is visible within one fan rather than at the end of the row, and lace is far quicker to unpick than it is to count backwards.
Stop at the end of a row, never mid-row. Picking a lace row back up halfway means working out which of the three rows you are on and where in the repeat you stopped, and getting that wrong costs the row. Finishing a row takes a few minutes; recovering a half-finished one takes longer than that.
It helps to keep a tally of completed row-3s on paper. The two panels have to match on row count, not on measured inches — lace measures differently depending on how it is lying, and two panels that both measured twenty inches on the sofa can finish an inch apart once they are blocked.
If you do lose the thread entirely, the recovery is to work back to the last complete row of fans and start again from there. A spacer row is quick to redo; half a fan row is not worth rescuing.
The Seam Decision
How you lay the two rectangles before seaming changes the neckline completely, and it is worth deciding before you pick up a needle.
The straight seam. Lay the panels on top of each other and seam along both side edges, leaving the middle open. The seams land on the shoulders and the result is a boat neck — wide, flat, and the simplest of the three.
The L-seam. Join the narrow end of one rectangle to the long side of the other, so the two make an L. Published patterns place a marker on the long edge somewhere between 15½ and 20½ inches from the corner depending on size, and sew the second panel’s short side to that point. This gives an asymmetric drape with a point at the front, and it is the version that reads as designed rather than assembled.
The vertical seam. The same two rectangles worn turned, so the seam runs down the centre front. Gives a V-neck.
Two things apply whichever you choose. Seam on the wrong side, and do not stretch the piece as you sew — lace will travel several inches under a firm hand and the two panels then finish at different lengths.
Neckline and Edging
An open lace edge curls and has no body. Work one round of single crochet around the neck opening first, putting one stitch into each stitch along the straight runs and two into the end of each row where you meet a row edge. That round evens everything out.
Then two or three more rounds, or a single round of reverse single crochet for a corded edge that sits flat without adding depth.
Around the hem, let the fans show. A single round of single crochet along the bottom is enough to stop the curl, and a deep border fights the lace. If you want weight at the hem, fringe is the traditional answer and it suits this stitch — the arcs give you evenly spaced points to attach it to.
Blocking
This stitch does not look like itself until it is blocked. On the hook the fans sit half closed and the fabric looks dense and uneven.
Wet the finished poncho, roll it in a towel, then pin it out flat with every fan opened and the edges straight. Leave it until completely dry.
Open lace relaxes substantially when wet, and it gains far more width than length. Pin to the measurements you worked to rather than to whatever shape it wants to take, or you will block a size larger by accident — the same discipline a rust maple leaf wrap needs for exactly the same reason.
10 Peacock Fan Poncho Ideas
1. Classic Teal
A single deep teal throughout, which is the colour the stitch is named for and the one that shows the arcs best.
Keep to one solid colour for a first attempt. The fans are the feature and anything else competes.
Confident beginner · 20 hours · 1,000 yds
2. Ombre Gradient
A gradient yarn cake running from deep teal through petrol to pale aqua down the length of the panels.
Work both panels from the same cake simultaneously, alternating, so the gradients match at the seam.
Confident beginner · 20 hours · 1,000 yds
3. Cream and Gold
Cream panels with every third fan row worked in a soft gold. Reads as formal rather than casual.
Change colour on the spacer row, not a fan row, so no individual fan is cut in half.
Confident beginner · 20 hours · 1,000 yds
4. Fringed Hem
The classic version with a deep fringe attached at the point of each hem fan.
One tassel per fan, not per stitch. Fringe on every stitch pulls the lace closed.
Confident beginner · 22 hours · 1,200 yds
5. Cropped Shoulder Cape
Panels at 14 inches high rather than 21, finishing at the elbow. Worn over a jumper rather than instead of one.
Keep the full width. A narrow cape rides up and sits like a collar.
Confident beginner · 13 hours · 650 yds
6. Fine Thread Evening Wrap
The same stitch in lace weight on a 3.0 mm hook, giving fans under an inch across.
Add two repeats to the chain. Smaller fans need more of them to reach the same width.
Intermediate · 30 hours · 1,400 yds
7. Charcoal Everyday Version
Deep charcoal in a wool blend, worn over everything through autumn.
Dark colours swallow the lace in photographs but read well in person. Worth knowing before you commit 1,000 yards.
Confident beginner · 20 hours · 1,000 yds
8. Two-Tone Panels
One panel in teal and one in cream, so the poncho reads differently from the front and the back.
Use the straight seam for this one. An L-seam mixes the two colours in a way that looks accidental.
Confident beginner · 20 hours · 1,000 yds
9. Hooded Version
A rectangle folded and seamed into a hood, attached around the neck opening before the edging goes on.
Work the hood in plain half double crochet. Lace over the head has no structure and collapses.
Intermediate · 24 hours · 1,200 yds
10. Matching Fan Scarf
A narrow three-repeat strip in the same yarn, from what is left over.
Chain 32 — three repeats plus the two. The multiple holds at any width.
Beginner · 4 hours · 220 yds
Common Problems and Fixes
The row runs out before the last fan
The foundation chain is not a multiple of 10 plus 2. There is no fix but to redo the chain, which is why it gets counted twice before row one.
The fans sit directly above each other
The offset was lost — a fan was worked into the wrong space on a row 3. Check that each fan sits over the pinch between two fans below, and take back to the row where that stopped being true.
The fabric looks dense and lumpy
Either the hook is too small for the yarn, or it has not been blocked. Nine trebles need room to open; before blocking they sit half closed and the fabric does look wrong.
The two panels finished at different lengths
Rows were measured rather than counted, or the piece was stretched while seaming. Count rows on both panels and seam without tension.
The neckline gapes
Too much of the seam was left open. On a straight-seam poncho the opening should be about 10 to 12 inches across; wider and it slides off a shoulder.
The hem curls upward
No edging at all. One round of single crochet is enough — the curl comes from the lace having no boundary, not from the lace being wrong.
Frequently Asked Questions
What is the stitch multiple for the peacock fan?
A multiple of 10 plus 2. Each repeat uses ten chains and the extra two carry the turning allowance and the final stitch.
How many trebles make one fan?
Nine, all into a single chain space. Nine stitches crowded into one point is what forces the arc open.
Is this stitch good for beginners?
Yes, once single crochet and treble crochet are comfortable. There is nothing else in it — the difficulty is keeping the count across a long row.
How much yarn does a poncho take?
About 1,000 yards of DK for a medium. The lace is open, so it uses noticeably less than a solid stitch over the same area.
What hook should I use?
5.5 to 6.0 mm with DK or light worsted — larger than the band suggests. The fans need space to open.
Why do my fans look squashed?
Hook too small, or the piece has not been blocked yet. Until it has been pinned out damp this stitch does not look like itself, and half-closed fans are the normal state on the hook.
Which seam should I use?
The straight seam for a boat neck and the simplest build, the L-seam for an asymmetric drape with a front point. Seam on the wrong side either way.
Can I make it bigger later?
Yes, if you joined along the foundation chain edges. Rows can then be added to the free edge without unpicking a seam.
What yarn shows the stitch best?
A smooth wool or bamboo blend in a solid colour. Fluffy yarns fill the gaps and variegated ones hide the arcs.
How long does a poncho take?
Around twenty hours for a medium. The panels are the whole job; the seaming and edging take under two.
Final Thoughts
Work one full repeat — a set-up row and two pattern rows — and block that swatch before starting a panel. It takes twenty minutes and it answers the two questions that matter: whether the hook is giving the fans room, and what the fabric actually measures once it has relaxed.
Then decide the seam before you start rather than after. The straight seam and the L-seam use identical rectangles, but the L needs a marker placed on one panel’s long edge, and that is much easier to do while the panel is still flat on the table than once it is half sewn.