 Clara•🕑 October 13, 2026•💬 No comments
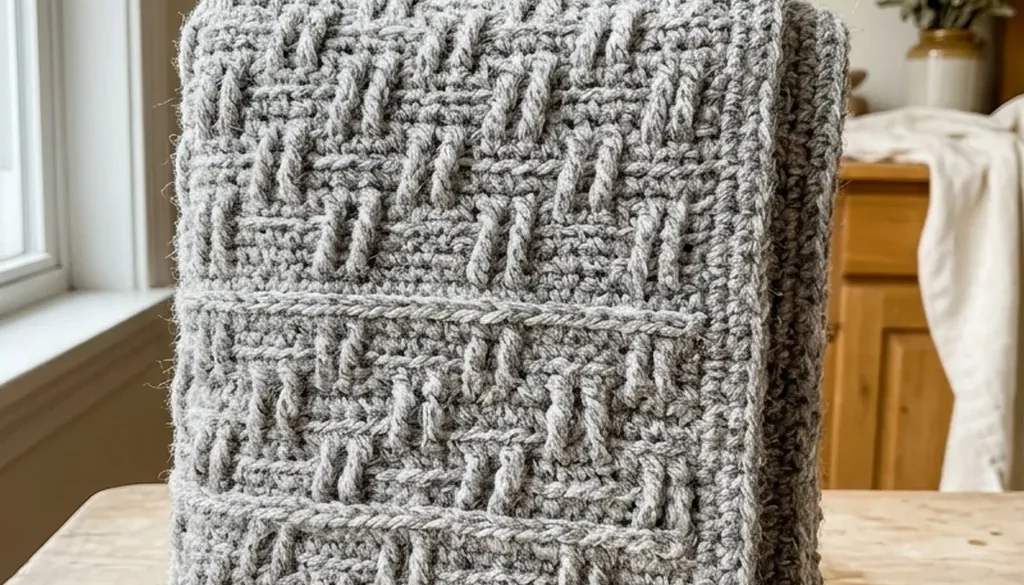
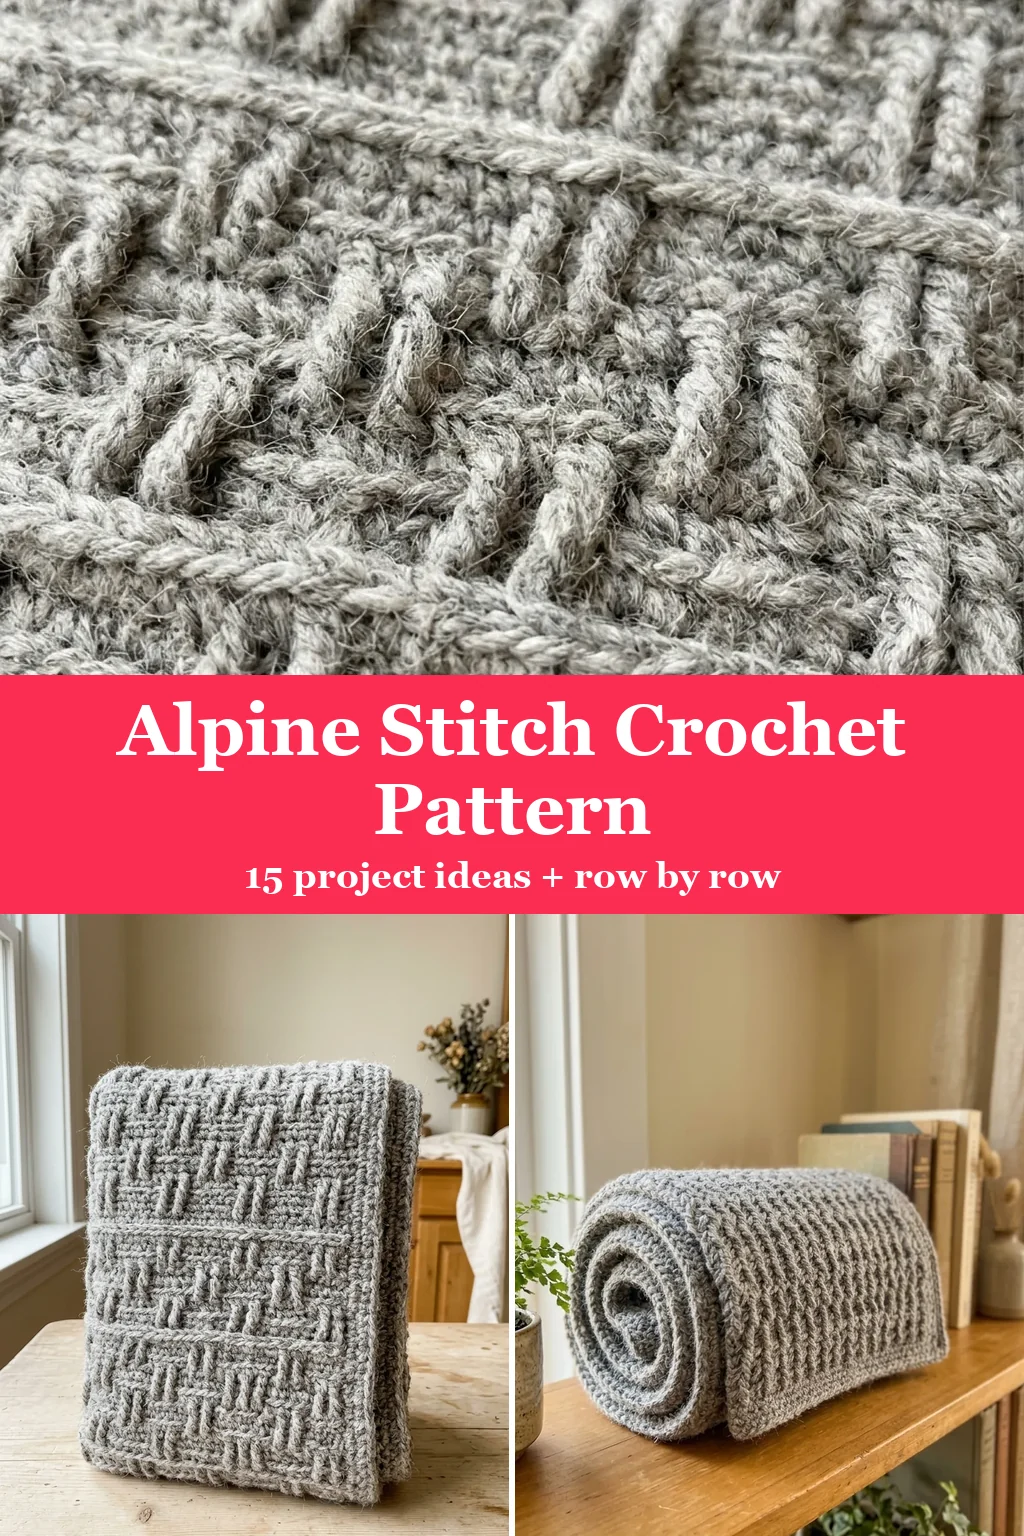
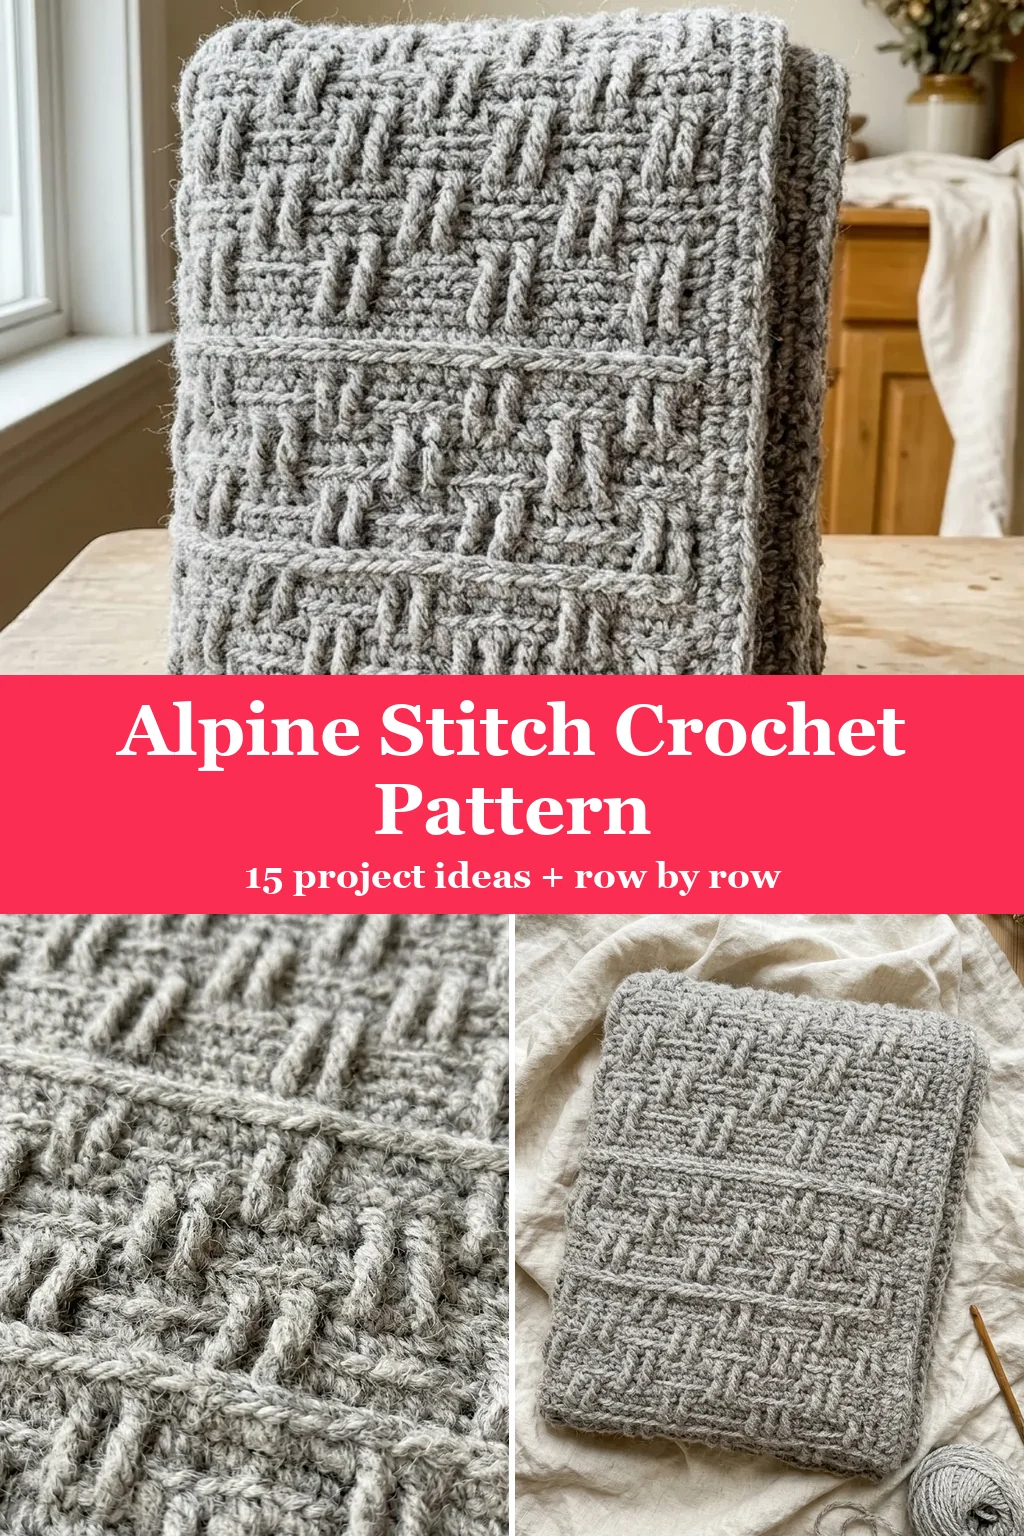
The alpine stitch makes a fabric that looks like it was knitted by someone with more patience than you have. Raised vertical columns stagger across a dense background, and from a foot away it reads as cables rather than crochet.
It is made of three stitches you probably already know, arranged in a four-row repeat. The only new idea is where one of them goes: around a post two rows down rather than into the stitch directly beneath. Everything that makes the alpine stitch work, and every way it goes wrong, comes back to that one instruction.
This is the alpine stitch crochet pattern written out row by row, with the fabric explained rather than just recited, and fifteen projects that suit what it produces.
Alpine Stitch at a Glance
| Skill level | Confident beginner — needs sc, dc and FPdc |
| Repeat | 4 rows |
| Stitches used | sc, dc, FPdc |
| Foundation | An odd number of chains |
| Fabric | Dense, warm, reversible on one face only |
| Also called | Ripple, raised ripple, aspen stitch |
What the Alpine Stitch Actually Is
Two kinds of row, alternating.
The plain rows are single crochet all the way across. They do no decorative work at all. What they do is hold the fabric together between the textured rows and set the height the posts have to reach over.
The alpine rows alternate a front post double crochet with an ordinary double crochet, all the way across. The front post stitches are what you see; the double crochets are the background they sit against.
Because the post stitches shift position between one alpine row and the next, the raised columns do not stack directly on top of each other. They stagger, and that stagger is what produces the peaks the stitch is named for.
The fabric that comes out is thick, warm and very stable. It uses noticeably more yarn than plain double crochet over the same area, which is the trade for the texture.
The Three Stitches You Need First
This is not a first project. You need single crochet, double crochet and front post double crochet before you start, because the alpine stitch combines all three and gives you nowhere to practise them.
The front post double crochet is the one worth rehearsing on a scrap. Instead of going into the top of a stitch, you yarn over and insert the hook from the front, around the body of the stitch below, passing right to left behind the post, then complete the double crochet normally. The stitch wraps around the post rather than sitting on top of it, which is what pushes it forward off the fabric.
Work a dozen on a scrap swatch until the motion stops feeling awkward. Nothing else in the pattern asks your hands to do something they have not done before.
The Foundation
- Chain an odd number. The odd count is what makes the alternation land correctly at both ends of every alpine row.
- Row 1: double crochet into the third chain from the hook, then one double crochet into every chain to the end.
- Count. You should have an odd number of stitches.
If the count comes out even, the alpine rows will finish on the wrong stitch and the edge will look chewed. Recount now, while the fix is one row rather than twenty.
The Four-Row Repeat
Rows 2 to 5 are the whole pattern. Everything after that repeats them.
Row 2 — plain
Chain 1, turn. Single crochet into every stitch to the end.
Row 3 — the first alpine row
Chain 2, turn. Then alternate:
- FPdc around the post of the double crochet two rows below — that is the row 1 stitch, not the single crochet underneath your hook.
- Skip the single crochet hiding behind that post stitch. It has been used.
- Dc into the next single crochet.
- Repeat to the end. The row finishes with a double crochet.
Row 4 — plain
Chain 1, turn. Single crochet into every stitch, including the tops of the post stitches.
Row 5 — the second alpine row, offset
Chain 2, turn. Same alternation, but the posts land in the other position: the front post stitches now go around the double crochets of row 3, and the plain double crochets go where the posts were.
That offset is the entire design. Rows 3 and 5 are structurally identical and differ only in which column each stitch type lands on, and the staggering of those columns is what makes the peaks.
Repeat rows 2 to 5 for the length you want. Finish on a plain single crochet row so the top edge is flat.
Why the Post Stitch Goes Two Rows Down
This is the instruction people get wrong, and it is worth understanding rather than memorising.
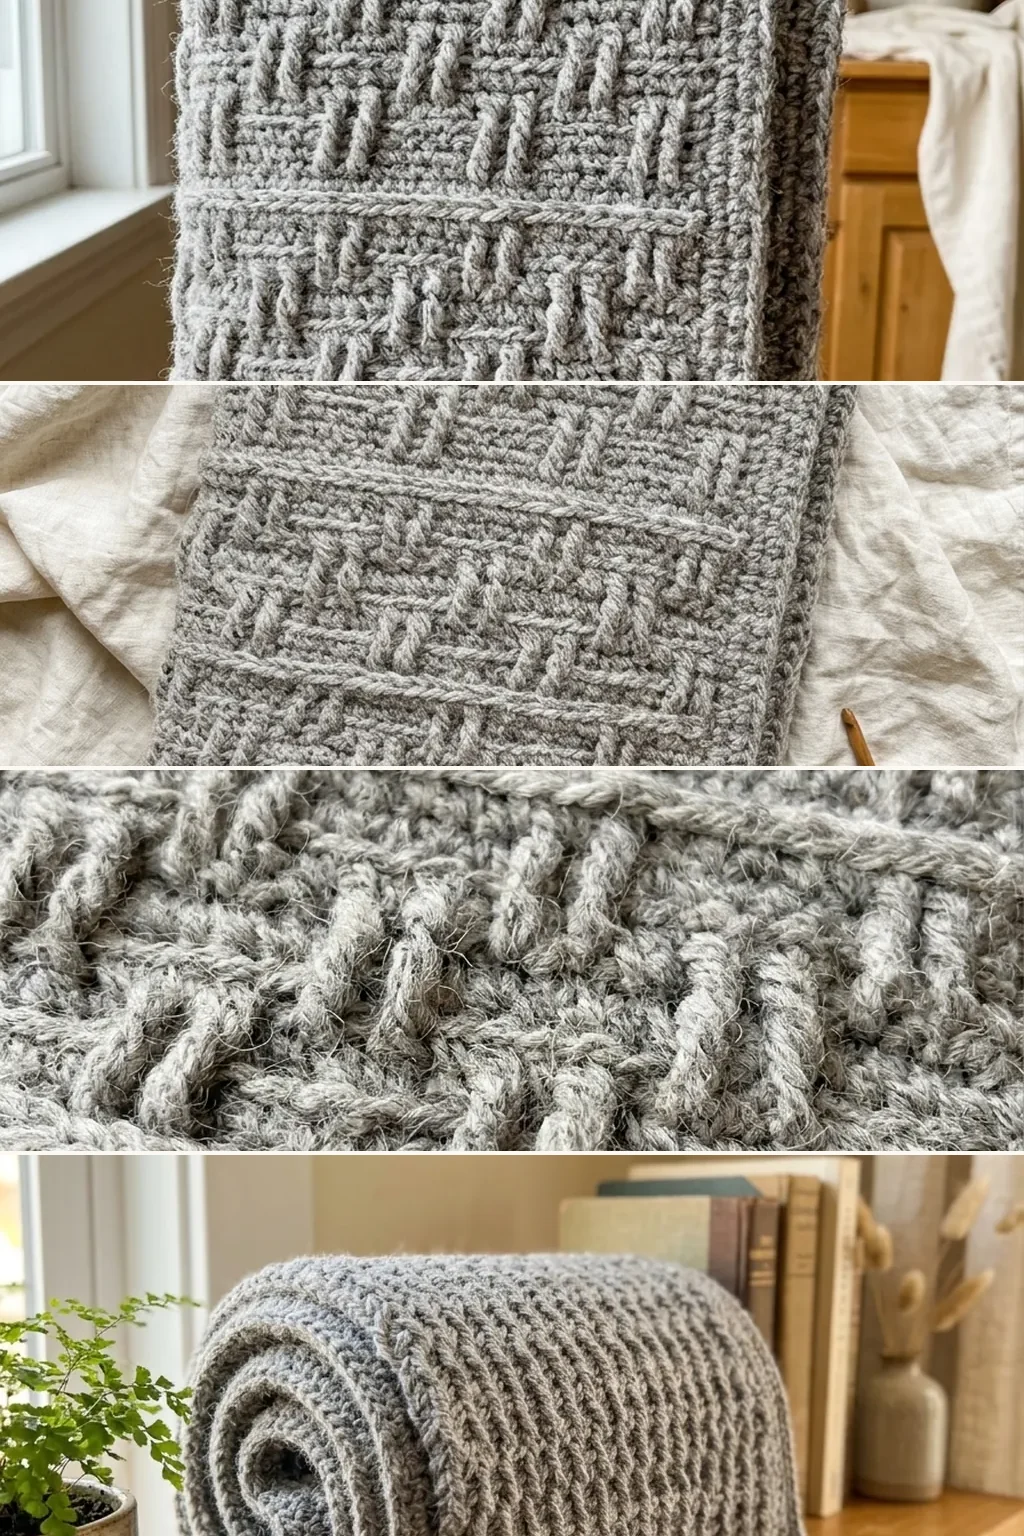
A front post double crochet worked around the stitch directly below would sit flush with the fabric, because there is nothing between it and its anchor. Reaching down two rows means the post stitch has to stretch over the intervening single crochet row, and the slack it needs comes forward. The raised column is literally the stitch bulging out because it was anchored too far away to lie flat.
The plain single crochet rows are therefore not filler. They set how far the post stitch must stretch, and so how far it stands proud. Swap them for double crochet rows and the texture flattens, because the post stitch no longer has to reach.
It also explains the one tension rule that matters: work the post stitches slightly loose. If you pull them tight they drag the fabric in and the whole piece curls toward you.
Reading Your Own Fabric
After four or five repeats the fabric tells you where you are, which matters because this pattern has no stitch markers and no row counter built into it.
- Looking at a row of raised columns? The next row is plain single crochet.
- Looking at a flat single crochet row? The next row is an alpine row.
- Unsure where the posts should land? Look two rows down. The post goes around whichever stitch was not a post last time.
If you have lost your place mid-row, the giveaway is the gap. A correctly worked alpine row has exactly one skipped single crochet behind every post stitch. Two skips in a row, or none, is where the error is.
Gauge, Curling and Yarn Choice
Alpine fabric is dense, so hook size does more than usual. Go up half a size from what the yarn band suggests — a 5.5 mm with worsted rather than 5.0 mm — and the post stitches have room to stand up instead of compacting.
Curling at the lower edge is the common complaint, and it has two causes. Tight post stitches is the first, covered above. The second is a foundation row worked at normal tension under a fabric that pulls in, which is solved by chaining with a hook one size larger and switching back for row 1.
For yarn, pick something with body and a smooth finish. Wool and wool blends show the texture best. Cotton works and makes a crisper, heavier fabric. Avoid anything fluffy, variegated or boucle — the whole point of this stitch is a shadow pattern, and a busy yarn erases it completely.
The fabric has a clear right side and a plain back. It is not reversible, which rules it out for scarves unless you work two panels back to back.
Borders That Suit It
Alpine fabric needs an edge, and not every border works on it. The side edges are a run of alternating stitch heights, so anything worked directly into them sits unevenly unless you even them out first.
Work one foundation round of single crochet all the way round before any decorative border: along the top and bottom put one stitch in each stitch, and along the sides put two stitches into the end of every alpine row and one into the end of every plain row. That two-to-one ratio is what matches the row heights and stops the sides pulling in.
After that round, almost anything works. Three more rounds of single crochet give a clean modern edge that holds the curl flat. A round of half double crochet followed by a picot round suits a baby blanket. Avoid a deep shell or fan border on a large piece: alpine is already heavy, and a wide decorative edge adds weight exactly where the fabric is least supported.
Block the finished piece before judging the border. Alpine relaxes a surprising amount when wet, and an edge that looked slightly tight on the hook usually settles flat.
15 Alpine Stitch Project Ideas
1. Classic Throw Blanket
The project the stitch is made for. A dense, heavy throw where the texture reads across the whole surface.
Chain for 40 inches and accept that it will take 1,800 yards. Alpine eats yarn.
Confident beginner · 30 hours · 1,800 yds
2. Baby Blanket
At 30 by 36 inches in soft merino, with a simple single crochet border.
Keep to one colour. A baby blanket in alpine is already busy enough.
Confident beginner · 15 hours · 900 yds
3. Cushion Cover
Two 18-inch squares seamed around a cushion pad, alpine on the front and plain double crochet on the back.
Work the back in the same yarn at a tighter gauge, or the cover sags on the plain side.
Confident beginner · 8 hours · 500 yds
4. Winter Beanie
Worked flat as a rectangle, seamed up the back, gathered at the crown. The columns run vertically up the head.
Work it 10 per cent shorter than you think. Alpine stretches lengthways under its own weight.
Confident beginner · 5 hours · 250 yds
5. Chunky Scarf, Double Thickness
Two long panels worked separately and seamed around all four edges, so both faces show the texture.
Work both panels at the same time, alternating rows, and the tension matches by itself.
Confident beginner · 12 hours · 700 yds
6. Textured Tote Bag
Cotton at a tight gauge, lined with fabric. The density of this stitch carries weight without stretching out.
Line it. An unlined crochet bag sags whatever stitch it is worked in.
Confident beginner · 10 hours · 600 yds
7. Panel Insert on a Plain Cardigan
A single alpine panel down each front of an otherwise plain double crochet cardigan.
Swatch both fabrics and match row height before committing — alpine runs shorter per row than dc.
Intermediate · 20 hours · 1,200 yds
8. Table Runner
A long narrow strip in cotton, with a picot edge. Heavy enough to lie flat without blocking.
Work it in a colour close to the table rather than contrasting. The texture is the feature.
Confident beginner · 7 hours · 450 yds
9. Two-Colour Stripe
Change colour on the plain single crochet rows only, leaving the post columns in the main shade.
Changing on an alpine row cuts the columns in half and the texture disappears into the stripe.
Confident beginner · 30 hours · 1,800 yds
10. Hot Water Bottle Cover
Thick wool, worked as a tube, with a buttoned flap. The density of alpine fabric holds heat well.
Measure the bottle full rather than empty. It is noticeably wider with water in it.
Confident beginner · 6 hours · 350 yds
11. Floor Pouffe Panel
Six alpine squares joined into a cube and stuffed. The stitch is dense enough to take sitting on.
Use a hook two sizes below the yarn band here, not above. Stuffing shows through loose fabric.
Confident beginner · 16 hours · 1,100 yds
12. Fingerless Mitts
Short rectangles seamed with a thumb gap. The raised columns run around the hand.
Work them in a 4-ply rather than worsted. Alpine in a heavy yarn makes mitts too bulky to use.
Confident beginner · 4 hours · 200 yds
13. Christmas Stocking
Alpine on the leg, plain single crochet on the foot and heel, with a contrasting cuff.
Keep the texture off the heel. Raised posts under a weight of chocolate oranges flatten anyway.
Intermediate · 8 hours · 450 yds
14. Bolster Cushion
A long rectangle seamed into a tube with gathered circular ends. The columns run the length of the bolster.
Work the end circles in plain double crochet. An alpine circle fights its own increases.
Intermediate · 9 hours · 550 yds
15. Sampler Blanket Square
A 12-inch alpine square as one block in a mixed-stitch sampler blanket.
Match the row height to the other blocks by swatching first, not by counting rows.
Confident beginner · 3 hours · 180 yds
Common Problems and Fixes
The fabric curls toward me
The post stitches are too tight. Work them a touch looser so they have the slack to stand forward rather than pulling the fabric in. Blocking helps a finished piece; it does not fix the cause.
The columns do not line up into peaks
The offset between the two alpine rows was lost — both rows put their posts on the same columns. Check that the posts on each alpine row go around the stitches that were plain double crochets last time.
The edges are uneven and chewed
Usually an even foundation count. The alternation then runs out at the wrong place and the last stitch of each alpine row lands differently every time. There is no fix but to restart with an odd chain.
My rows are getting narrower
The single crochet hiding behind each post stitch is being worked as well as skipped, or skipped twice. Count after every alpine row until the rhythm is automatic.
The texture looks flat
Either the plain rows were worked in double crochet instead of single crochet, or the hook is too small. The post stitch needs a shorter row to reach over and room to bulge forward.
The fabric is too short for the pattern’s gauge
Front post treble crochet in place of the front post double adds height without changing the structure. Some published alpine patterns are written with FPtr from the start, so check which one your pattern means before swatching.
Variations Worth Knowing
Front post treble. Taller posts, a more pronounced ripple and a looser fabric. The substitution to make when your row gauge is running short.
Working in the round. The alternation still works, but you must keep an odd stitch count around the whole round and the offset shifts at the join. Mark the round start.
Colour on the plain rows only. The cleanest way to add stripes without breaking the columns, because the post stitches stay in one colour throughout.
The stitch goes under several names — ripple stitch, raised ripple, aspen stitch, and plain descriptions like alternating front post and double crochet. They are the same fabric. If a pattern you like uses one of those names, it will work exactly as described here. It pairs well as a body fabric with motif-led garments like a blush butterfly cardigan, where the plain mesh could be swapped for something with more structure.
Frequently Asked Questions
Is the alpine stitch good for beginners?
Not as a first project. You need single crochet, double crochet and front post double crochet already comfortable, because the pattern combines all three from row 3 onward.
How many rows is the repeat?
Four. A plain single crochet row, an alpine row, another plain row, then an alpine row with the posts offset.
Why do I chain an odd number?
The alternation of post and plain stitches only lands correctly at both ends of the row on an odd count. An even count leaves a ragged edge.
Where exactly does the front post stitch go?
Around the post of the stitch two rows below, not into the single crochet directly under the hook. Then skip the single crochet hiding behind it.
How much yarn does it use?
Noticeably more than plain double crochet over the same area — budget around a third extra. A 40-inch throw runs to roughly 1,800 yards in worsted.
Is it reversible?
No. The texture is on the front only and the back is plain. For a scarf, work two panels and seam them back to back.
Why does my fabric curl?
The post stitches are worked too tightly. Give them a little slack so they stand forward instead of drawing the fabric in.
Can I work it in the round?
Yes, keeping an odd stitch count throughout and marking the start of each round. The offset shifts at the join, so check it there first.
What yarn shows it best?
Smooth wool or a wool blend in a solid colour. Variegated, fluffy and boucle yarns hide the shadows the texture depends on.
Is the alpine stitch the same as the ripple stitch?
Yes. It is also called the raised ripple and the aspen stitch, and some patterns simply describe it as alternating front post and double crochet.
Final Thoughts
Work a swatch of three full repeats before starting anything. Twelve rows is enough to see whether your post stitches are tight, whether the hook is right and whether the columns are staggering properly, and all three are far cheaper to fix in a swatch than in a blanket.
Then pick a project that suits a dense, one-sided fabric. Alpine makes an excellent blanket, cushion or bag, and a poor shawl. Where a project wants structure in the body and decoration elsewhere, it carries plain sections well — the plain skirt on a sunshine daisy baby dress is the kind of panel that would take this stitch without competing with the motifs above it.
1 thought on “Alpine Stitch Crochet Pattern: 15 Project Ideas”